Docs
ARCPanel
ARCPanel is an extension for Adobe Photoshop that solves the pain of building luminosity masks.
Actively supported version is ARCPanel 3.0. It is free and works on Adobe Photoshop CC 2022 and later. ARCPanel Pro enables advanced functionality.
For older versions of Adobe Photoshop (2015.5 - 2022) you can use ARCPanel 2.2. It has a free trial for 7 days and has to be purchased afterwards. All features are always enabled. Is no longer actively developed and will not have new features added.
There are 3 tabs in ARCPanel: ARCMask, ARCRetouch and ARCSharpen
Clear the state and remove temporary panel channels.
ClearEnables Quick Apply mode when preview is disabled and clicking on buttons instantly replaces mask in the currently selected layer
Creates a new group with mask filled white color
Creates a new group with mask filled black color
Generates endless color grading combinations of colors that look good together.
SOURCE
Creates a Luminosity mask and uses it as a source for future mask calculations. Will be used until applied, replaced with another source or cleared.
LuminosityCreates a Luminosity mask using luminosity of the Red channel and uses it as a source for future mask calculations. Will be used until applied, replaced with another source or cleared.
RCreates a Luminosity mask using luminosity of the Green channel and uses it as a source for future mask calculations. Will be used until applied, replaced with another source or cleared.
GCreates a Luminosity mask using luminosity of the Blue channel and uses it as a source for future mask calculations. Will be used until applied, replaced with another source or cleared.
BCreates a Saturation mask using most saturated pixels of an image and uses it as a source for future mask calculations. Will be used until applied, replaced with another source or cleared.
SaturationAllows to build a mask using color range sliders. Uses Luminosity by default, but if Saturation is selected will select saturated color ranges. Click to start.
MASKS & ZONES
Allows to select any luminosity range using sliders. Builds mask on True Luminosity, ignoring colors. May not match luminosity exactly. Click to start.
Builds Darks mask
DarksBuilds Lights mask
LightsBuilds Darks-1 mask
Darks 1Builds Mids-1 mask
Mids 1Builds Lights-1 mask
Lights 1Builds Darks-2 mask
Darks 2Builds Mids-2 mask
Mids 2Builds Lights-2 mask
Lights 2Builds Darks-3 mask
Darks 3Builds Mids-3 mask
Mids 3Builds Lights-3 mask
Lights 3Builds Darks-4 mask
D 4Builds Mids-4 mask
Mids 4Builds Lights-4 mask
L 4Builds Darks-5 mask
DBuilds Mids-5 mask
Mids 5Builds Lights-5 mask
L0
1
2
3
4
5
6
7
8
9
10
REFINE & APPLY
Let's you build a new mask and add it to the current mask. Use = to calculate result.
Let's you build a new mask and subtract it from the current mask. Use = to calculate result.
Let's you build a new mask and multiply it to the current mask. Use = to calculate result.
Builds result of calculation.
Refine with
Allows to refine the mask using Levels adjustment
LevelsAllows to refine the mask using Curves adjustment
CurvesAllows to refine the mask by inverting it
Apply to
Creates new Levels adjustment layer as sets built mask on it
Creates new Curves adjustment layer as sets built mask on it
Creates a new selection using built mask
Applies built mask to the currently selected layer
To LayerPaint current mask onto layer mask. Sets foreground color to white, selects brush. If layer has no mask, sets black mask, otherise paints on existing mask. Hides marching ants.
- Creates new Curves adjustment layer as sets built mask on itCurves
- Creates new Levels adjustment layer as sets built mask on itLevels
- Creates new Brightness/Contrast adjustment layer as sets built mask on itBrightness/Contrast
- Creates new Hue/Saturation adjustment layer as sets built mask on itHue/Saturation
- Creates new Exposure adjustment layer as sets built mask on itExposure
- Creates new Solid color adjustment layer as sets built mask on itSolid color
- Creates new Black & White adjustment layer as sets built mask on itBlack & White
- Creates new Photo filter adjustment layer as sets built mask on itPhoto filter
- Creates new Vibrance adjustment layer as sets built mask on itVibrance
- Creates new Color balance adjustment layer as sets built mask on itColor balance
- Creates new Selective color adjustment layer as sets built mask on itSelective color
- Creates new Channel mixer adjustment layer as sets built mask on itChannel mixer
TOOLS
Creates a special curve that makes it much easier to spot dust, scratches or issues with clone stamp on the image.
Solar CurveFREQUENCY SEPARATION
Build
ORTON EFFECT
Generates Orton Effect in a Heavy configuration that darkens image a little.
Orton HeavyGenerates Orton Effect in a Soft dreamy configuration that lightens image a little.
Orton SoftDODGE & BURN
Generates Dodge & Burn using grey layers.
Grey LayersGenerates Dodge & Burn using curves.
Via CurvesGenerates automatic Dodging & Burning allowing select ranges via Blend If
AutomaticFit in width & height in px
Width in px to fit image into
Height in px to fit image into
Adjusts jpg image quality until it fits the limit. Will use maximum quality if empty.
Something to put in front of the name for every saved file.
Name to use for every saved file. Will use original filename if left empty.
Something to put in the end of the name for every saved file.
Sharpen for web
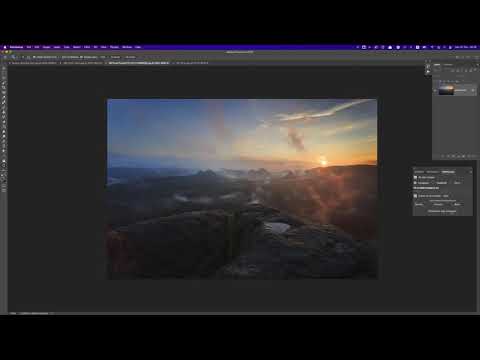
Sharpen for webARCMask let's you build fast and high quality luminosity, saturation and color masks, refine them and apply to any layer you want.
ARCRetouch is there to help with common tasks like Dodge & Burn, Frequency Separation or Orton Effect.
ARCSharpen will help when your image is ready and needs sharpening for the web.
Keep reading to see all ARCPanel features with video examples - every video is short 10-15 seconds clip without audio, so feel free to press that play button.
ARCMask
Clear the state and remove temporary panel channels.
ClearEnables Quick Apply mode when preview is disabled and clicking on buttons instantly replaces mask in the currently selected layer
Creates a new group with mask filled white color
Creates a new group with mask filled black color
Generates endless color grading combinations of colors that look good together.
SOURCE
Creates a Luminosity mask and uses it as a source for future mask calculations. Will be used until applied, replaced with another source or cleared.
LuminosityCreates a Luminosity mask using luminosity of the Red channel and uses it as a source for future mask calculations. Will be used until applied, replaced with another source or cleared.
RCreates a Luminosity mask using luminosity of the Green channel and uses it as a source for future mask calculations. Will be used until applied, replaced with another source or cleared.
GCreates a Luminosity mask using luminosity of the Blue channel and uses it as a source for future mask calculations. Will be used until applied, replaced with another source or cleared.
BCreates a Saturation mask using most saturated pixels of an image and uses it as a source for future mask calculations. Will be used until applied, replaced with another source or cleared.
SaturationAllows to build a mask using color range sliders. Uses Luminosity by default, but if Saturation is selected will select saturated color ranges. Click to start.
MASKS & ZONES
Allows to select any luminosity range using sliders. Builds mask on True Luminosity, ignoring colors. May not match luminosity exactly. Click to start.
Builds Darks mask
DarksBuilds Lights mask
LightsBuilds Darks-1 mask
Darks 1Builds Mids-1 mask
Mids 1Builds Lights-1 mask
Lights 1Builds Darks-2 mask
Darks 2Builds Mids-2 mask
Mids 2Builds Lights-2 mask
Lights 2Builds Darks-3 mask
Darks 3Builds Mids-3 mask
Mids 3Builds Lights-3 mask
Lights 3Builds Darks-4 mask
D 4Builds Mids-4 mask
Mids 4Builds Lights-4 mask
L 4Builds Darks-5 mask
DBuilds Mids-5 mask
Mids 5Builds Lights-5 mask
L0
1
2
3
4
5
6
7
8
9
10
REFINE & APPLY
Let's you build a new mask and add it to the current mask. Use = to calculate result.
Let's you build a new mask and subtract it from the current mask. Use = to calculate result.
Let's you build a new mask and multiply it to the current mask. Use = to calculate result.
Builds result of calculation.
Refine with
Allows to refine the mask using Levels adjustment
LevelsAllows to refine the mask using Curves adjustment
CurvesAllows to refine the mask by inverting it
Apply to
Creates new Levels adjustment layer as sets built mask on it
Creates new Curves adjustment layer as sets built mask on it
Creates a new selection using built mask
Applies built mask to the currently selected layer
To LayerPaint current mask onto layer mask. Sets foreground color to white, selects brush. If layer has no mask, sets black mask, otherise paints on existing mask. Hides marching ants.
- Creates new Curves adjustment layer as sets built mask on itCurves
- Creates new Levels adjustment layer as sets built mask on itLevels
- Creates new Brightness/Contrast adjustment layer as sets built mask on itBrightness/Contrast
- Creates new Hue/Saturation adjustment layer as sets built mask on itHue/Saturation
- Creates new Exposure adjustment layer as sets built mask on itExposure
- Creates new Solid color adjustment layer as sets built mask on itSolid color
- Creates new Black & White adjustment layer as sets built mask on itBlack & White
- Creates new Photo filter adjustment layer as sets built mask on itPhoto filter
- Creates new Vibrance adjustment layer as sets built mask on itVibrance
- Creates new Color balance adjustment layer as sets built mask on itColor balance
- Creates new Selective color adjustment layer as sets built mask on itSelective color
- Creates new Channel mixer adjustment layer as sets built mask on itChannel mixer
Luminosity masks made easy
Mask Sources
SOURCE
Creates a Luminosity mask and uses it as a source for future mask calculations. Will be used until applied, replaced with another source or cleared.
LuminosityCreates a Luminosity mask using luminosity of the Red channel and uses it as a source for future mask calculations. Will be used until applied, replaced with another source or cleared.
RCreates a Luminosity mask using luminosity of the Green channel and uses it as a source for future mask calculations. Will be used until applied, replaced with another source or cleared.
GCreates a Luminosity mask using luminosity of the Blue channel and uses it as a source for future mask calculations. Will be used until applied, replaced with another source or cleared.
BCreates a Saturation mask using most saturated pixels of an image and uses it as a source for future mask calculations. Will be used until applied, replaced with another source or cleared.
SaturationAllows to build a mask using color range sliders. Uses Luminosity by default, but if Saturation is selected will select saturated color ranges. Click to start.
Mask source is a base for all other masks. By default, Luminosity is used, but you can select other sources to generate, eg. Saturation masks
- Luminosity – regular luminosity mask
- R – luminosity mask for Red channel
- G – luminosity mask for Green channel
- B – luminosity mask for Blue channel
- Saturation – mask, applying to most saturated pixels of the image
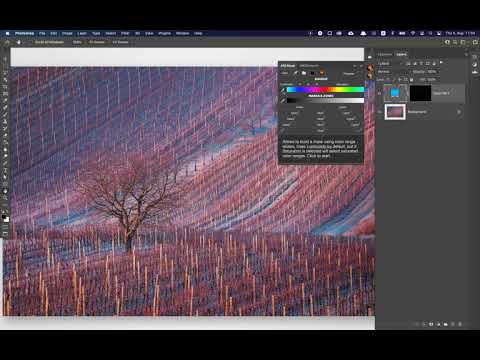
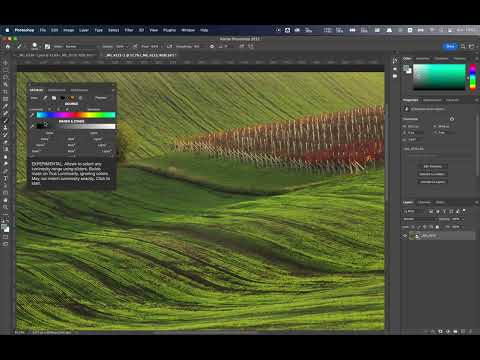
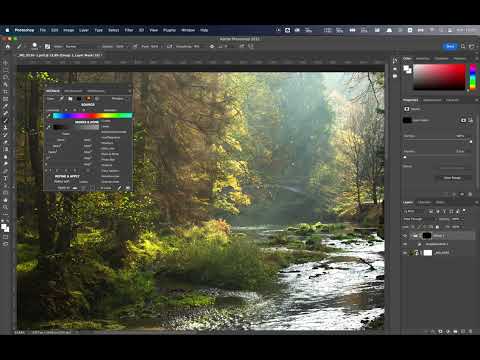
Hue range masks
SOURCE
Creates a Luminosity mask and uses it as a source for future mask calculations. Will be used until applied, replaced with another source or cleared.
LuminosityCreates a Luminosity mask using luminosity of the Red channel and uses it as a source for future mask calculations. Will be used until applied, replaced with another source or cleared.
RCreates a Luminosity mask using luminosity of the Green channel and uses it as a source for future mask calculations. Will be used until applied, replaced with another source or cleared.
GCreates a Luminosity mask using luminosity of the Blue channel and uses it as a source for future mask calculations. Will be used until applied, replaced with another source or cleared.
BCreates a Saturation mask using most saturated pixels of an image and uses it as a source for future mask calculations. Will be used until applied, replaced with another source or cleared.
SaturationAllows to build a mask using color range sliders. Uses Luminosity by default, but if Saturation is selected will select saturated color ranges. Click to start.
Hue range mask (or Color mask) is a part of source and is built based on already selected source options: Luminosity or Saturation.
Luminosity is used by default, meaning that colors will be selected based on their luminanse values. Selecting Saturation as the source will change color slider to select based on color saturation values.
After hue mask is applied it itself becomes the Source and can be modified by any masks – that means that you can select a range of colors from the image based on their Saturation values and after that select brightest of them by clicking Lights-3 on Masks
- Color Picker – lets you pick a color from the image to build color mask
- Color Slider – click anywhere on the slider to select a range, drag handles to modify the range. Click Build Maks or Cancel to apply or cancel color mask.
- Feather and Boost - move Feather and Boost sliders to better control the selection.
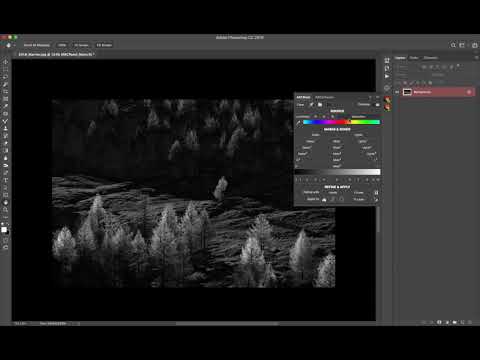
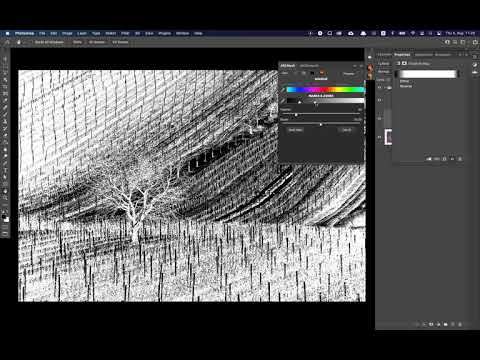
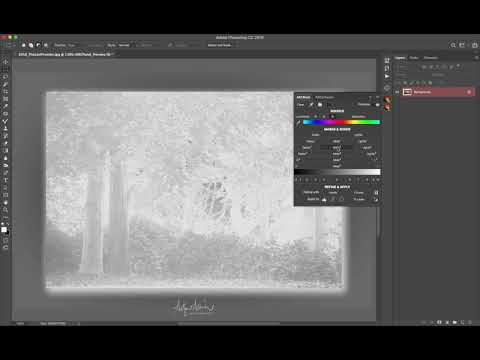
Luminosity range masks
Allows to select any luminosity range using sliders. Builds mask on True Luminosity, ignoring colors. May not match luminosity exactly. Click to start.
Builds Darks mask
DarksBuilds Lights mask
LightsBuilds Darks-1 mask
Darks 1Builds Mids-1 mask
Mids 1Builds Lights-1 mask
Lights 1Builds Darks-2 mask
Darks 2Builds Mids-2 mask
Mids 2Builds Lights-2 mask
Lights 2Builds Darks-3 mask
Darks 3Builds Mids-3 mask
Mids 3Builds Lights-3 mask
Lights 3Builds Darks-4 mask
D 4Builds Mids-4 mask
Mids 4Builds Lights-4 mask
L 4Builds Darks-5 mask
DBuilds Mids-5 mask
Mids 5Builds Lights-5 mask
LLuminosity is a spectrum that is not limited to Lights 1-5 and other ranges. Luminosity range masks brings flexibility into luminosity mask creation allowing to pick the mask you need by just moving a slider.
Functionality is very similar to Range Masks from Lightroom, but in Photoshop, with the availability of layers, this gives a completely different level of flexibility.
- Range picker - lets you pick a luminosity from the image and slider will auto select correct values
- Luminosity slider - controlling two sliders, select any range you want. Having right-most slider fully on the right will give lights. Having left-most slider fully on the left will give darks masks. Having two sliders in the middle will give midtones selections.
- Feather and Boost - move Feather and Boost sliders to better control the selection.
Masks
Luminosity / Saturation
Allows to select any luminosity range using sliders. Builds mask on True Luminosity, ignoring colors. May not match luminosity exactly. Click to start.
Builds Darks mask
DarksBuilds Lights mask
LightsBuilds Darks-1 mask
Darks 1Builds Mids-1 mask
Mids 1Builds Lights-1 mask
Lights 1Builds Darks-2 mask
Darks 2Builds Mids-2 mask
Mids 2Builds Lights-2 mask
Lights 2Builds Darks-3 mask
Darks 3Builds Mids-3 mask
Mids 3Builds Lights-3 mask
Lights 3Builds Darks-4 mask
D 4Builds Mids-4 mask
Mids 4Builds Lights-4 mask
L 4Builds Darks-5 mask
DBuilds Mids-5 mask
Mids 5Builds Lights-5 mask
LMask is generated based on selected source: Luminosity, Saturation or Color. If no source is selected – Luminosity is used.
Gradient provides a hint on which part of the image will be selected
- Darks from 1 to 6 – generates masks for darks parts of the image
- Mids from 1 to 6 – generates masks for midtones
- Lights from 1 to 6 – generates masks for light parts of the image
Adams' Zones System
Read more about zones here
0
1
2
3
4
5
6
7
8
9
10
Adams' Zones “slice” image into luminosity ranges, selecting only required part of the image for you
Zone is generated based on selected source. If no source is selected – Luminosity is used
Gradient provides a hint on which part of the image will be selected
- Zones 0-10 – generates Adam's zone masks

Calculator
Let's you build a new mask and add it to the current mask. Use = to calculate result.
Let's you build a new mask and subtract it from the current mask. Use = to calculate result.
Let's you build a new mask and multiply it to the current mask. Use = to calculate result.
Builds result of calculation.
Calculator lets you Add, Subtract or Multiply any mask with any mask.
- Build some mask,
- Pick operator,
- build another mask,
- press on "="
Built mask will be the result of operation you have picked.
You can continue this process until you get the result you want.
Calculator works with all masks, uncluding Hue Range and Luminosity Range.
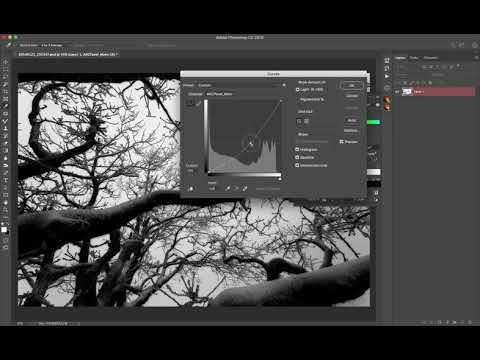
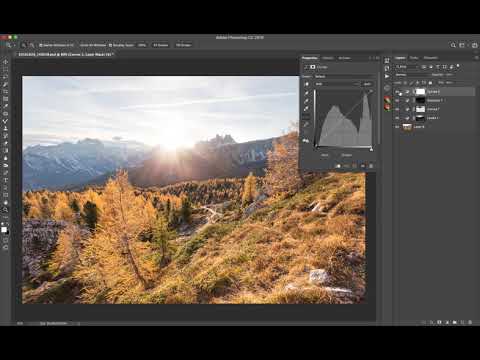
Refine
Refine with
Allows to refine the mask using Levels adjustment
LevelsAllows to refine the mask using Curves adjustment
CurvesAllows to refine the mask by inverting it
Refine lets you apply some changes to the generated mask
- Levels – will invoke Layers dialog allowing to shift light balance of the mask
- Curves – will invoke Curves dialog allowing to refine mask
- Invert – will invert the mask
Apply
Apply to
Creates new Levels adjustment layer as sets built mask on it
Creates new Curves adjustment layer as sets built mask on it
Creates a new selection using built mask
Applies built mask to the currently selected layer
To LayerPaint current mask onto layer mask. Sets foreground color to white, selects brush. If layer has no mask, sets black mask, otherise paints on existing mask. Hides marching ants.
- Creates new Curves adjustment layer as sets built mask on itCurves
- Creates new Levels adjustment layer as sets built mask on itLevels
- Creates new Brightness/Contrast adjustment layer as sets built mask on itBrightness/Contrast
- Creates new Hue/Saturation adjustment layer as sets built mask on itHue/Saturation
- Creates new Exposure adjustment layer as sets built mask on itExposure
- Creates new Solid color adjustment layer as sets built mask on itSolid color
- Creates new Black & White adjustment layer as sets built mask on itBlack & White
- Creates new Photo filter adjustment layer as sets built mask on itPhoto filter
- Creates new Vibrance adjustment layer as sets built mask on itVibrance
- Creates new Color balance adjustment layer as sets built mask on itColor balance
- Creates new Selective color adjustment layer as sets built mask on itSelective color
- Creates new Channel mixer adjustment layer as sets built mask on itChannel mixer
Apply section lets to set generated mask on the desired layer
- Levels – creates a new Levels adjustment with generated mask set
- Curves – creates a new Curves adjustment with generated mask set
- Selection – makes built mask into an active selection
- To Layer – sets built mask on the selected layer, overriding existing mask
- Paint mask – allows to paint though built mask over the mask of a selected layer
- Adjustment Layer – lets you pick any Adjustment layer and set mask on it
Paint mask
Apply to
Creates new Levels adjustment layer as sets built mask on it
Creates new Curves adjustment layer as sets built mask on it
Creates a new selection using built mask
Applies built mask to the currently selected layer
To LayerPaint current mask onto layer mask. Sets foreground color to white, selects brush. If layer has no mask, sets black mask, otherise paints on existing mask. Hides marching ants.
- Creates new Curves adjustment layer as sets built mask on itCurves
- Creates new Levels adjustment layer as sets built mask on itLevels
- Creates new Brightness/Contrast adjustment layer as sets built mask on itBrightness/Contrast
- Creates new Hue/Saturation adjustment layer as sets built mask on itHue/Saturation
- Creates new Exposure adjustment layer as sets built mask on itExposure
- Creates new Solid color adjustment layer as sets built mask on itSolid color
- Creates new Black & White adjustment layer as sets built mask on itBlack & White
- Creates new Photo filter adjustment layer as sets built mask on itPhoto filter
- Creates new Vibrance adjustment layer as sets built mask on itVibrance
- Creates new Color balance adjustment layer as sets built mask on itColor balance
- Creates new Selective color adjustment layer as sets built mask on itSelective color
- Creates new Channel mixer adjustment layer as sets built mask on itChannel mixer
Paint mask is a special function, that gives a one-button shortcut to a widely used technique in processing.
Often we want to paint desired effect through a mask. Usually, this requires to:
- build a mask
- make a selection
- hide marching ants
- select a brush
- set foreground color to white
- select mask (set it black if it's missing)
All these steps are done automatically by pressing Paint Mask button. Panel will also conviniently show if there is a selection with hidden ants active at any moment.
Quick Actions
Clear the state and remove temporary panel channels.
ClearEnables Quick Apply mode when preview is disabled and clicking on buttons instantly replaces mask in the currently selected layer
Creates a new group with mask filled white color
Creates a new group with mask filled black color
Generates endless color grading combinations of colors that look good together.
Quick actions are small utility shortcuts that can improve your workflow speed
- Clear – clears ARCPanel state, removing selections, channels and active masks
- Quick Blend – when activated, disables preview and directly applies selected mask on the selected layer. Very helpful when blending images together.
- Group with white mask – a button to quickly group layers with white mask applied
- Group with black mask – a button to quickly group layers with black mask applied
- Preview on hover – disables or enables preview on hover functionality

Infinite Color
One click on Infinite Color button generates a random color grading preset that can be manually adjusted. Keep clicking until you find a pleasing color combination and then tailor it to your needs.
Feature works best for city and portrait images allowing to quickly get to film-like colors.
More details in this article. You can also learn more about color grading in general in this article.
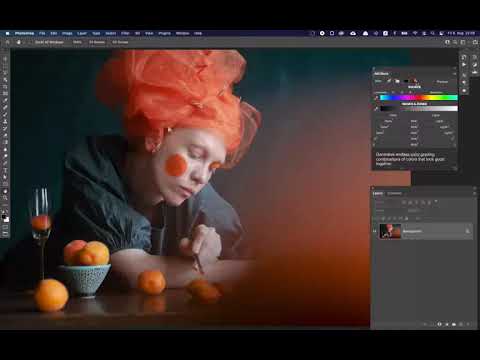
Image on the video provided by Tellisman Svitozar
ARCRetouch
TOOLS
Creates a special curve that makes it much easier to spot dust, scratches or issues with clone stamp on the image.
Solar CurveFREQUENCY SEPARATION
Build
ORTON EFFECT
Generates Orton Effect in a Heavy configuration that darkens image a little.
Orton HeavyGenerates Orton Effect in a Soft dreamy configuration that lightens image a little.
Orton SoftDODGE & BURN
Generates Dodge & Burn using grey layers.
Grey LayersGenerates Dodge & Burn using curves.
Via CurvesGenerates automatic Dodging & Burning allowing select ranges via Blend If
AutomaticUseful enhancements at your disposal
Tools
TOOLS
Creates a special curve that makes it much easier to spot dust, scratches or issues with clone stamp on the image.
Solar CurveLittle tools to make your life easier
- Solar Curve – a special curve that makes it much easier to spot dust, scratches or issues with clone stamp on the image.
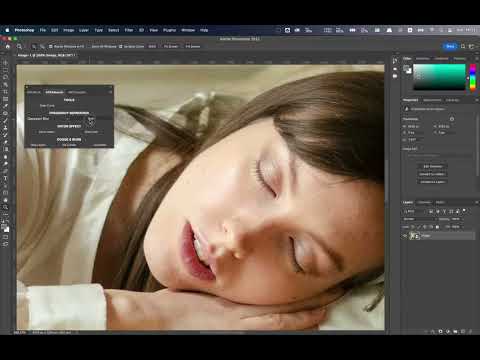
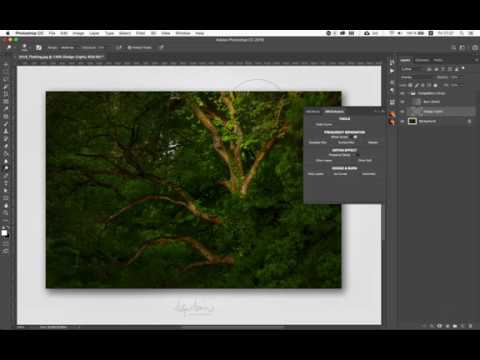
Frequency Separation
FREQUENCY SEPARATION
Build
Frequency Separation is a tool that lets you extract texture and modify it independently from other parts of the image.
Main appliances: smoothening human skin, fixing lens flares, professional product retouching.
ARCRetouch previews both texture and tone(color), letting you select exactly the right frequency you need for your image.
- Gaussian Blur gives more conventional results
- Surface Blur works good in portraits
- Median gives much better results and fine-tuning for product retouching.
Every method will generate extra layers for quick re-touching of low and high frequencies and a hidden Texture Boost layer to simplify work with skin.
Orton Effect
ORTON EFFECT
Generates Orton Effect in a Heavy configuration that darkens image a little.
Orton HeavyGenerates Orton Effect in a Soft dreamy configuration that lightens image a little.
Orton SoftOrton Effect is a very popular enhancement brining that magical glow to the pictures
- Orton Heavy – strong and visible Orton Effect
- Orton Soft – a softer version of Orton Effect
Selecting Preserve Darks checkbox will also apply a special mask, that will exclude effect from darkest parts of the image to avoid underexposure.
Orton Heavy before/after
Orton Soft before/after
Dodge & Burn
DODGE & BURN
Generates Dodge & Burn using grey layers.
Grey LayersGenerates Dodge & Burn using curves.
Via CurvesGenerates automatic Dodging & Burning allowing select ranges via Blend If
AutomaticDodging and Burning is the main post-processing technique. Dodging is brightening, and Burning is darkening parts of the image.
Panel provides 3 Dodge & Burn techniques
- Grey Layers – the most used technique – two 50% grey layers with Overlay and Soft Light blending modes
- Curves – A bit emore advanced technique – 2 curves adjustment layers layered in Luminosity. Curves set the limit of dodge/burn to avoid clipping.
- Automatic – Good for portraits. Lets you select Blend-If ranges for lights and darks – this allows to automatically update Dodge and Burn when underlying pictures changes
ARCSharpen
Fit in width & height in px
Width in px to fit image into
Height in px to fit image into
Adjusts jpg image quality until it fits the limit. Will use maximum quality if empty.
Something to put in front of the name for every saved file.
Name to use for every saved file. Will use original filename if left empty.
Something to put in the end of the name for every saved file.
Sharpen for web
Sharpen for webFree and easy way to make your image ready for web.
Sharpen
Whether you want to sharpen only current image or all images opened in Photoshop – ARCSharpen can handle it for you.
There are size presets for Instagram and Facebook that give you best image quality for social networks, but you are also welcome to set custom values with "Fit in" selected.
Clicking on "Sharpen for web" will sharpen opened files, but not save them.
Algorithm is a widely used step size sharpening: first image size is set to double the target, then image is sharpened, downsized to target size and sharpened again – this gives great results that both keep the quality high and make image look great in the browser.
Export
If you also would like to export files as sRGB JPG, click on Export checkbox.
You can limit size of the files to a value in kilobytes. During export, ARCSharpen will keep your selected width and height, but will pick a lower quality of jpg compression value to fit size that you want as close as possible.
Select the folder you want to save your images to.
Optionally, set Prefix, Name and Suffix. Prefix will be put in front of every file, Suffix will be put to the end. If you don't set a Name, original filename will be used, otherwise same Name will be applied to every file.
For example, with Prefix
November_, Name Saxony, Suffix _Nightsky will give you filenames of November_Saxony_Nightsky_1 and so on, with number in the end increasing for each file. This also happens if when saving file with such name already exists.Clicking "Sharpen for web and export", ARCSharpen will sharpen your images and save into selected folder.
If something doesn't work
Development is a tricky process and some times you might find a bug.
In that case, please send the following information:
- Operating System version
- Adobe Photoshop version
- ARCPanel log files
You can find log files in following locations:
MacOS:
/Users/<USER>/Library/Logs/Adobe/<Adobe_Photoshop_Version>/
Windows: Users\YOUR_USER\AppData\Roaming\Adobe\Adobe Photoshop <Adobe_Photoshop_Version>\Logs