Share
Color grade in Adobe Photoshop like in Davinci Resolve

Color grading is a big topic in video production. It's kind of the same as post processing in photography, but for video. It helps convey the mood of videographer and make sure colors are correct in the resulting image.
When it comes to video, everybody seems to agree that the best grading tools is Davinci Resolve. In Davinci Resolve, you have 4 color wheels that let you separately control lights, shadows, midtones and overall offset of the image. There are also many extra controls available that modify the range where shadows or midtones work.

Indeed, it's very powerful and gives you many ways to grade the video and apply LUTs.
In the Photoshop you can also apply LUTs (Look Up Tables) with Color Lookup adjustment layer, but if you didn't yet buy a set of nice LUTs to use here is how you can grade any image with the help of luminosity masks.
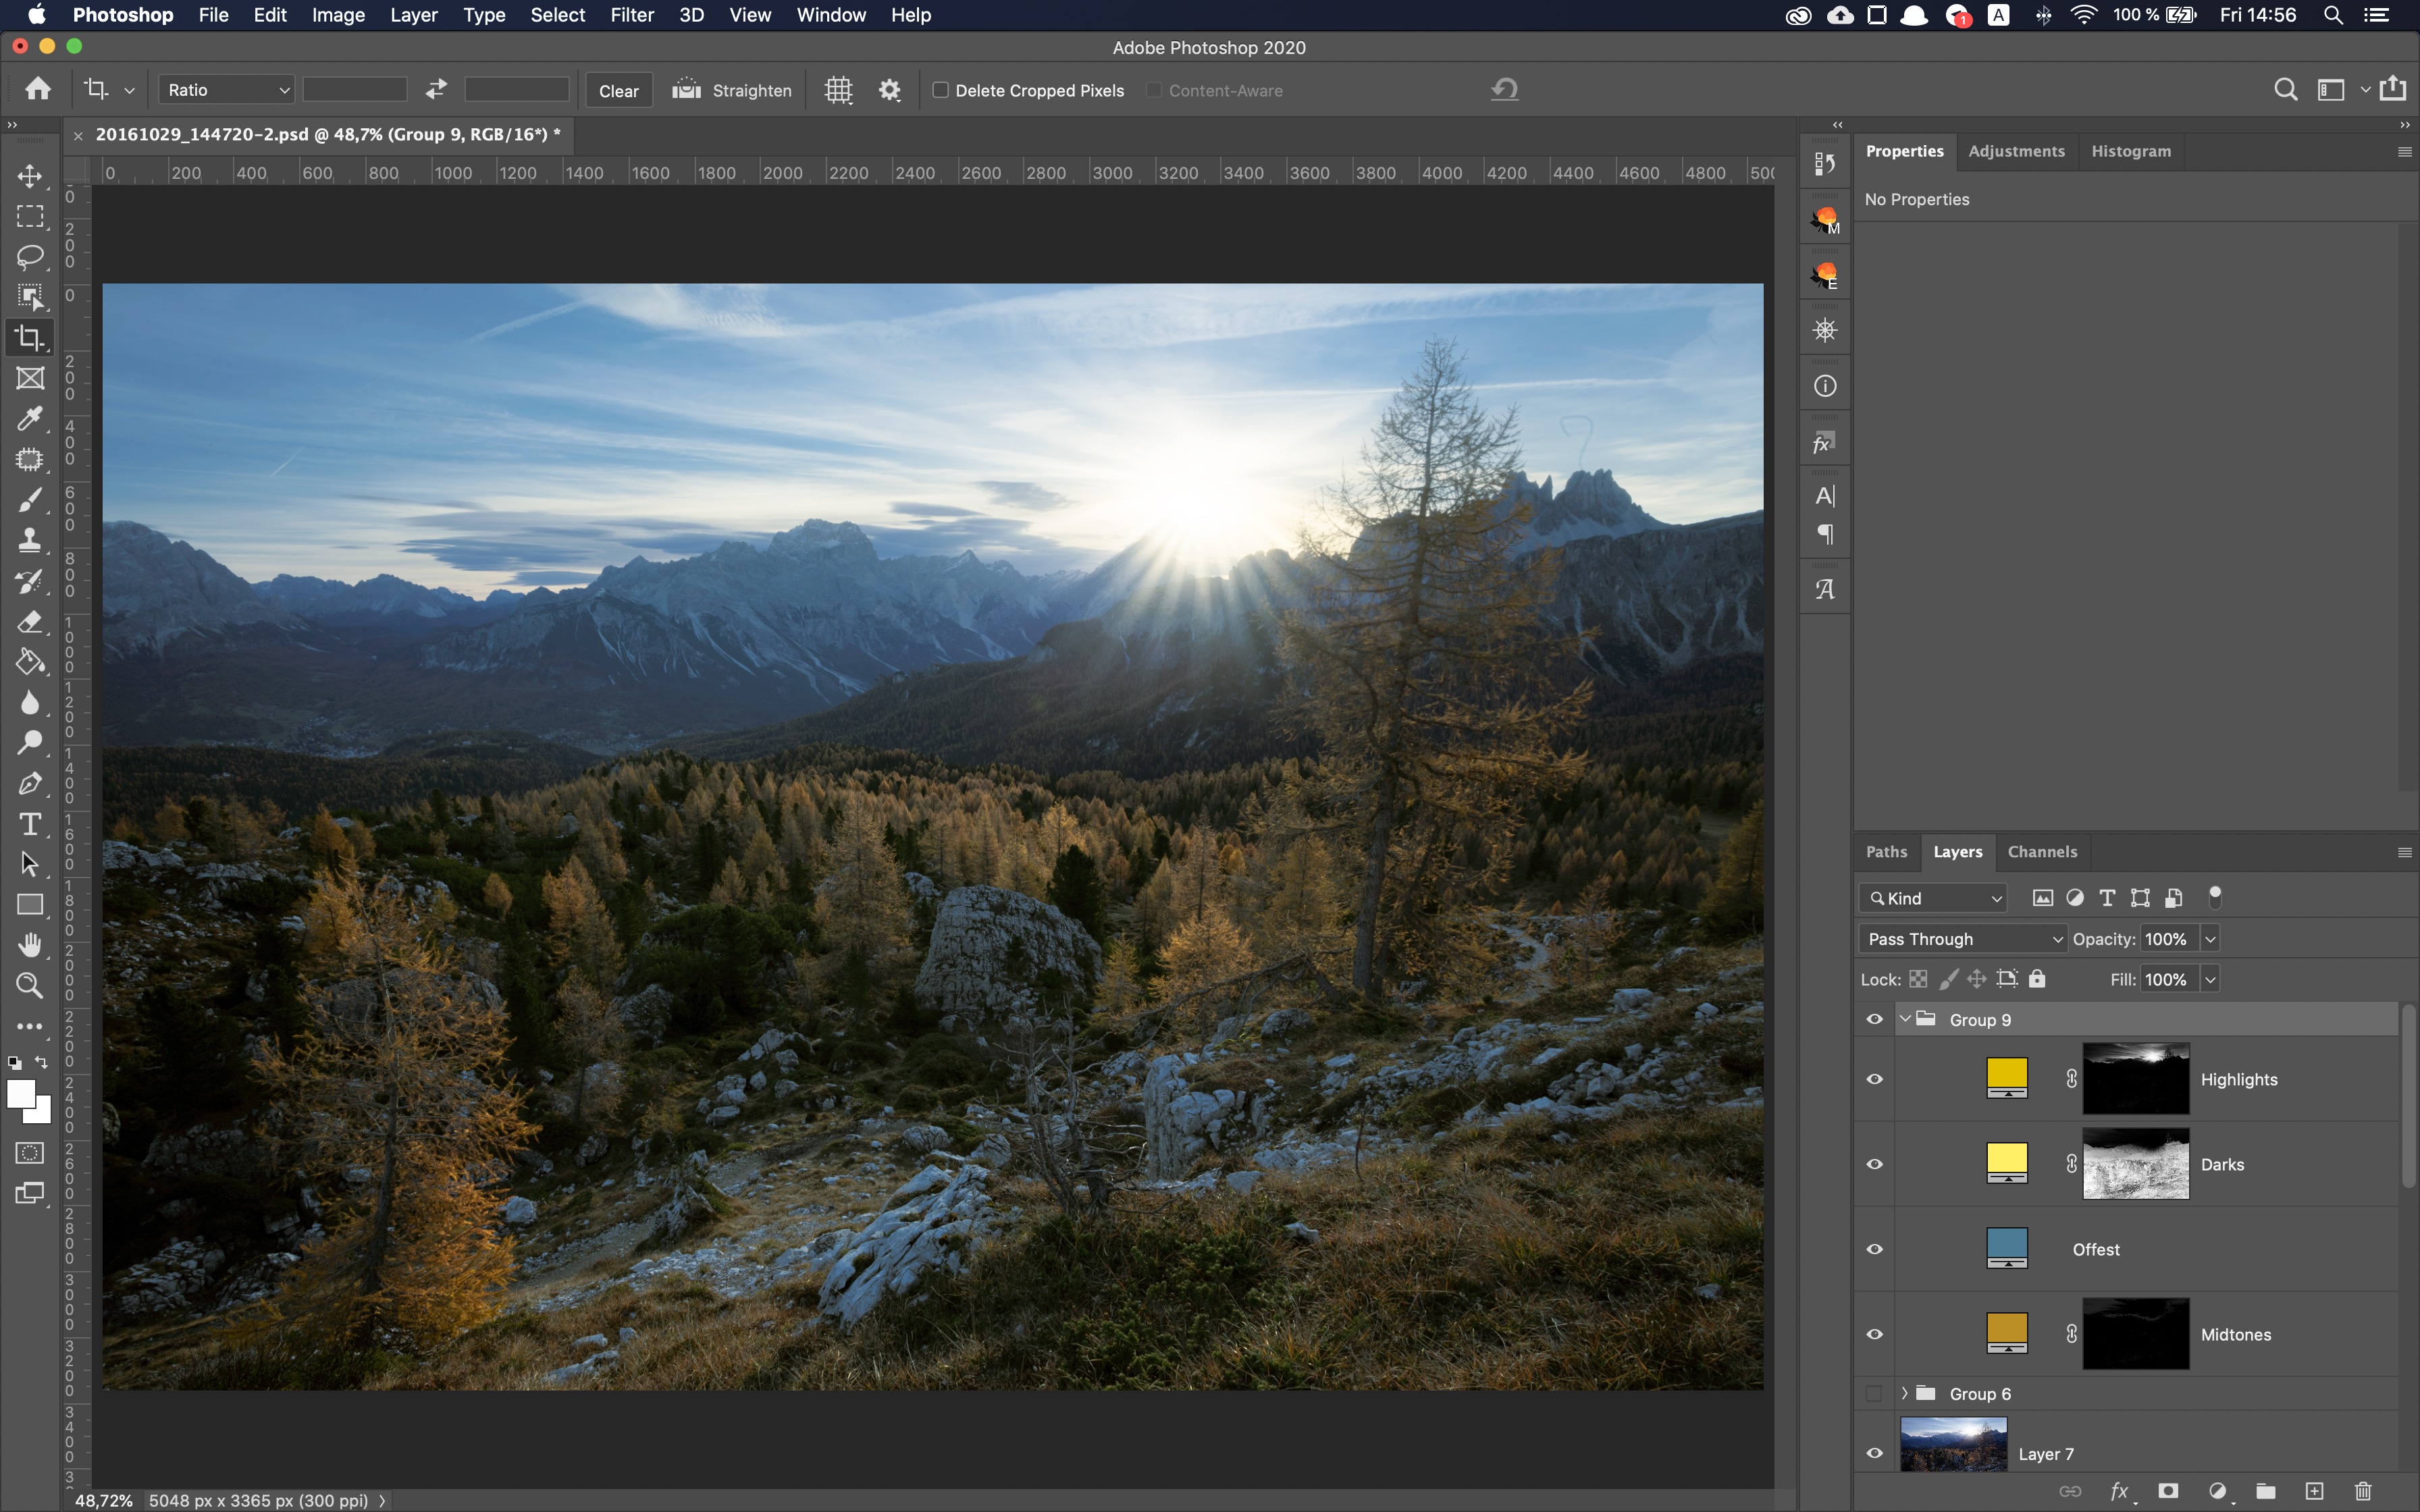
- Create 4 new Solid Color adjustment layers. Set color on each to 50% gray, blending mode to Overlay.


- Delete empty masks from each.

- Name first Highlights and apply Lights-2 mask on it

- Name second Shadows and apply Darks-2 mask on it.

- Name third one Offset and set it's opacity to 70%

- Name forth one Midtones, build Mids-1 mask and refine it with Levels adjustment, setting Shadows at 115.

Now you can play with colors the same way you would in Davinci Resolve and results will be almost identical.
There are a few issues with this approach that I found. Midtones, for example, in Davinci Resolve and very limiting and doesn't affect the image much. Offset, on the other hand, does a bit too much.
So my advice would be to try different kinds of masks on your grading layers to get results that you want. After all, changing the mask is just one click.
This method doesn't give you spectral image analysis or detailed controls, but it's free and quite easy to build.
Preparing login widget...