In this article
Luminosity Masks – Dodge&Burn with luminosity masks
As I have already mentioned once in Lesson 2, when post-processing an image different techniques are usually combined.
In the last 3 lessons you have learned how different kinds of masks help to limit desired processing effect, focusing on lights, darks or midtones.
Each kind of mask has it's own feature, like blending exposures for lights.
But if we look at how all masks work in general, all of them allow to limit desired processing effect in some way, and exactly limiting complex effects with luminosity masks is a key approach in modern post-processing.
Using an example let's see how different masks help us apply on of the most popular "effects" - Dodging and Burning.
Dodge & Burn
The main idea of Dodge&Burn is to darken or brighten some parts of the image with care and control.
It's this care and control that masks give us.
There are many ways to brighten and darken the image. First you need to understand what is your goal.
Setting the goal
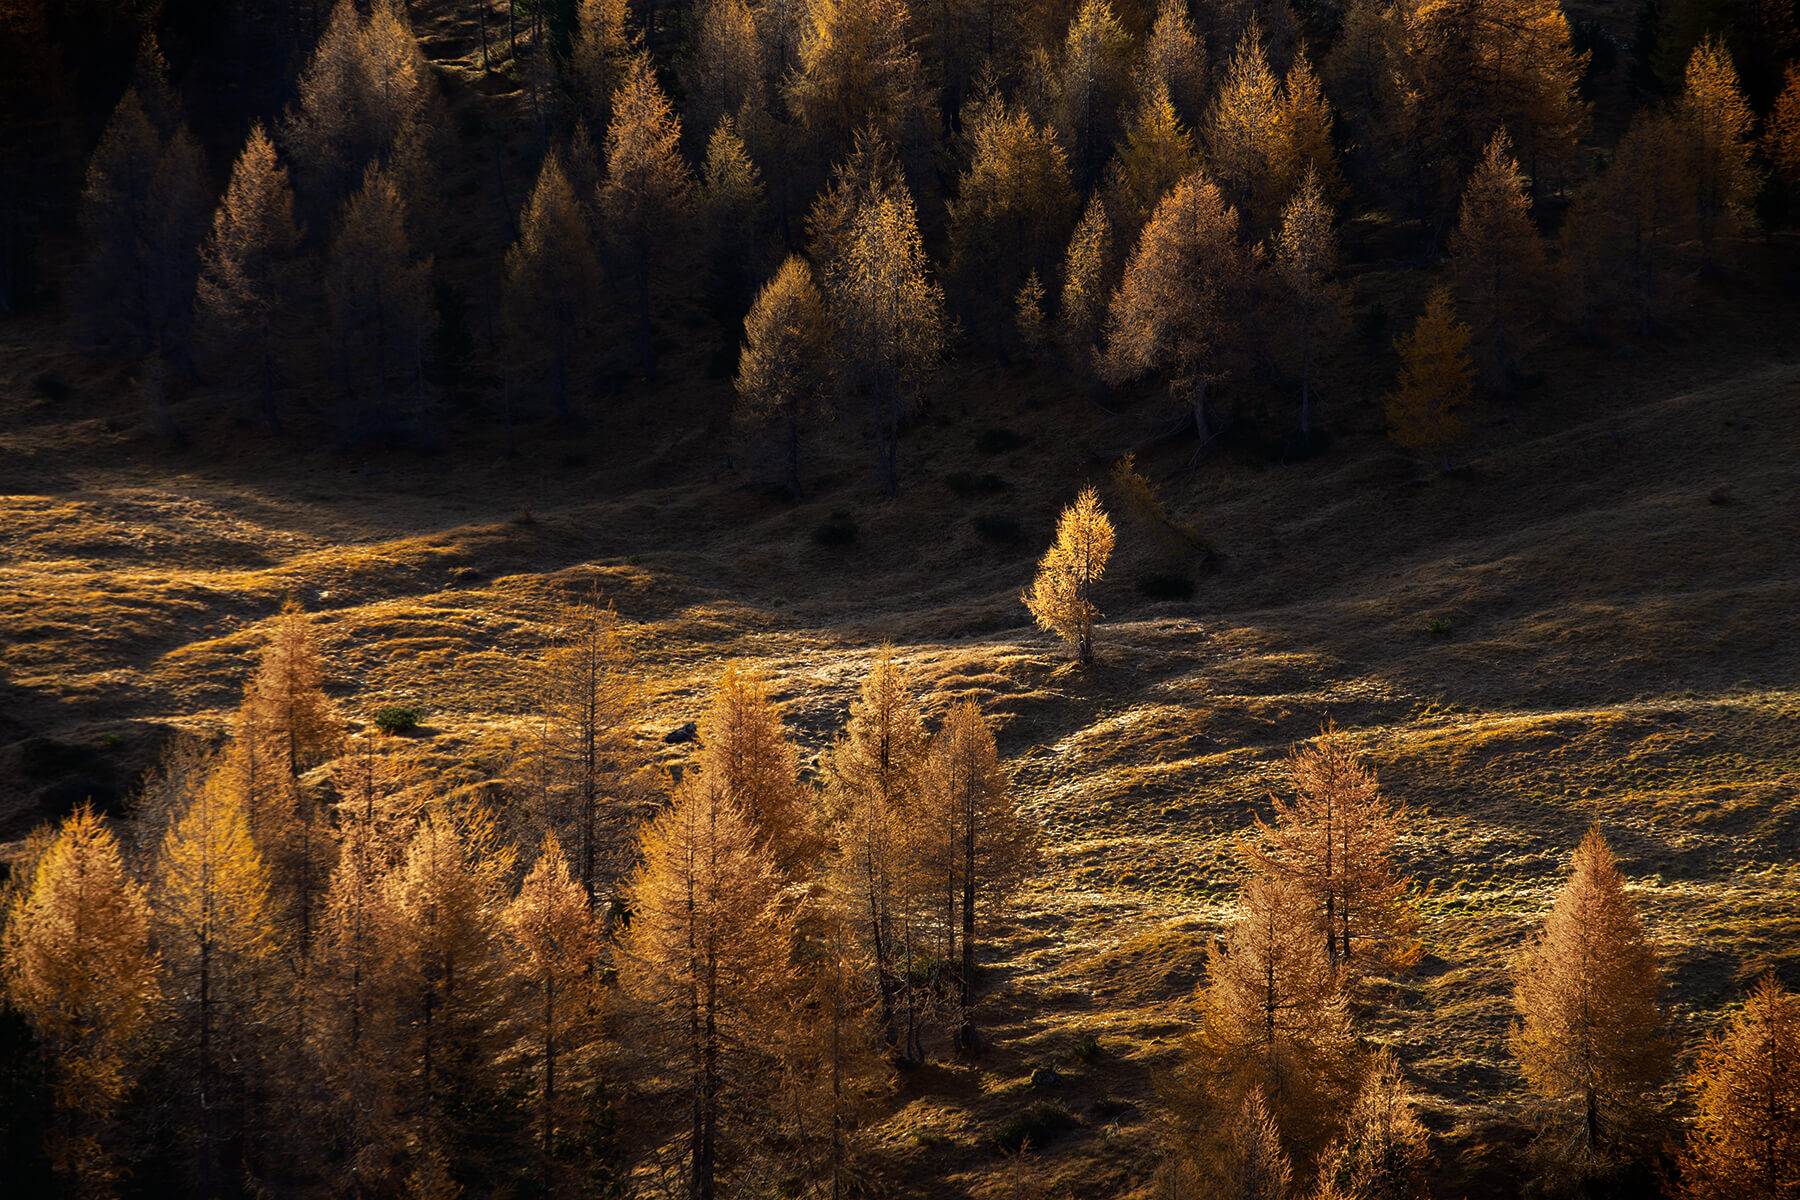
Let's look at this photograph that I took in one of the autumn trips to Dolomites.

Main subject is the lonely standing tree in the middle of the frame. I named image "Warrior". Soft morning light carefully lights all of the trees, highlighting the leaves. Unfortunately, trees in the lower part of the frame are lit much brighter then the one on the top - they attract too much attention. I would like them to be less bright, keeping the focus on our "Warrior". I also would want more contrast in the image, so that brightly lit tops of the trees on the top part of the frame would be brighter but, again, not as bright as the main "character". To ensure eye of the viewer stays in the frame I want to darken sides of the image, especially the trees on the edges, because they attract too much attention. And, finally, I want more accent on the small hill in the center.
All this can be done with Dodge&Burn, and such a mental thought play can help you better understand what you want to achieve processing the image.
Processing step by step
Darkening shadows
Let's start by darkening shadows increasing overall contrast. We would need to make sure that deep shadows did not become too dark. To do that we need to make new Levels adjustment layer limited by Darks-3 luminosity mask.

Darkening hills
Then we would darken hills around, keeping the one in the center shining. For that we need to make a new layer, fill it with 50% gray by selecting
Edit - Fill - 50% Gray and put into Soft Light blending mode.
Painting with semi-transparent black brush on such a layer we will be darkening parts of the image. Let's limit this layer with Lights mask.

Lowering saturation
Now let's lower saturation of the bright trees in the bottom of the frame. To do that let's make a Saturation mask and refine it with some levels further targeting our trees.

We will cover our saturation effect by a group with black mask and carefully paint in parts of the trees where we want to see the effect. Let's also add a curves adjustment layer, limited by Lights mask, to bring back brightness of trees.

Increase the mood
As the next step we darken the image overall. Let's make a new 50% gray layer in Soft Light mode. To ensure that dark parts of the image do not become too dark, let's limit it with Darks-4 mask. Now we can either paint with semi-transparent black brush on it or, for example, select
Image - Adjustment - Levels and darken the whole layer.
Bring the focus
One of the last steps would be to bring the shine to the hero of the image. We can do that by creating a new curves adjustment layer with Lights mask, refined so that background behind the tree would be as dark as possible, but the tree itself would be still bright enough.

Let's make sure that our curves is in Normal blending mode - that way effect will work not only on the brightness, but also on the colors. By default ARCPanel creates adjustment layers in Luminosity blending mode to ensure careful work with lights.
After increasing the contrast on the mask, let's cover the effect by a group with black mask and carefully paint in effect on the main subject. Then we would need to also paint in some of the effect on other trees to make sure they don't look too dull now.

Vignetting
And as the last step I have darkened edges of the frame a little, again using 50% gray layer.
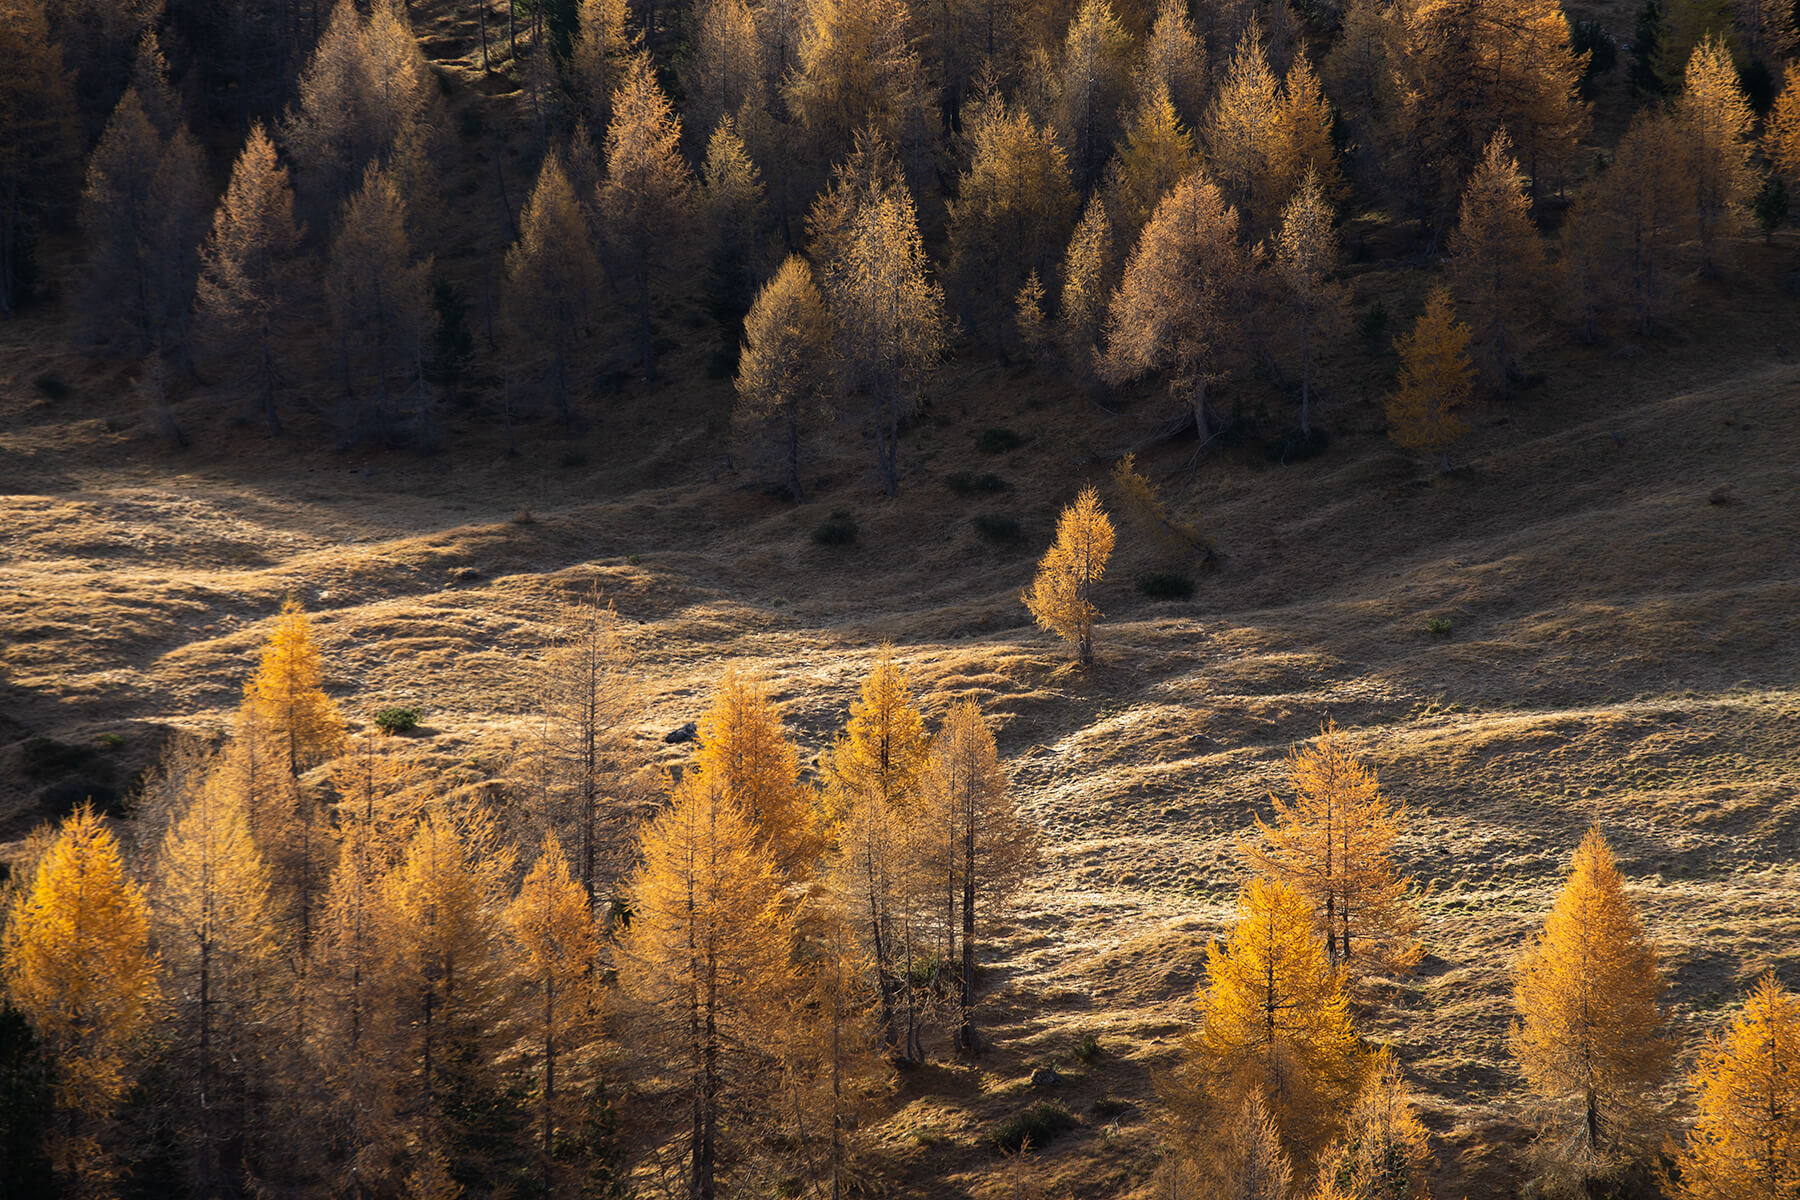
Here is the result:

Let's compare images before and after processing:
Summary
It's impossible to cover all luminosity masking techniques in a 1 week course.
ARCPanel features do not end on the basic luminosity masks. There are also Adam's Zones, color masks, saturations masks and many other things.
You can use them to:
- paint-in effects through selected areas
- blend complex exposures
- color-tone the whole image or just small parts of it
- create careful vignetting
I hope this little course helped you to understand what are luminosity masks and how they can be used in practice.
Preparing login widget...