Share
Luminosity Masks – Dark luminosity masks
In this lesson we will focus on darks masks.
Darks or shadow masks allow to limit the area, where effect will be applied, to shadows.
With the dark masks help we can control not only overall brightness and contrast in shadows, but also work with small shadow details.
Practical example
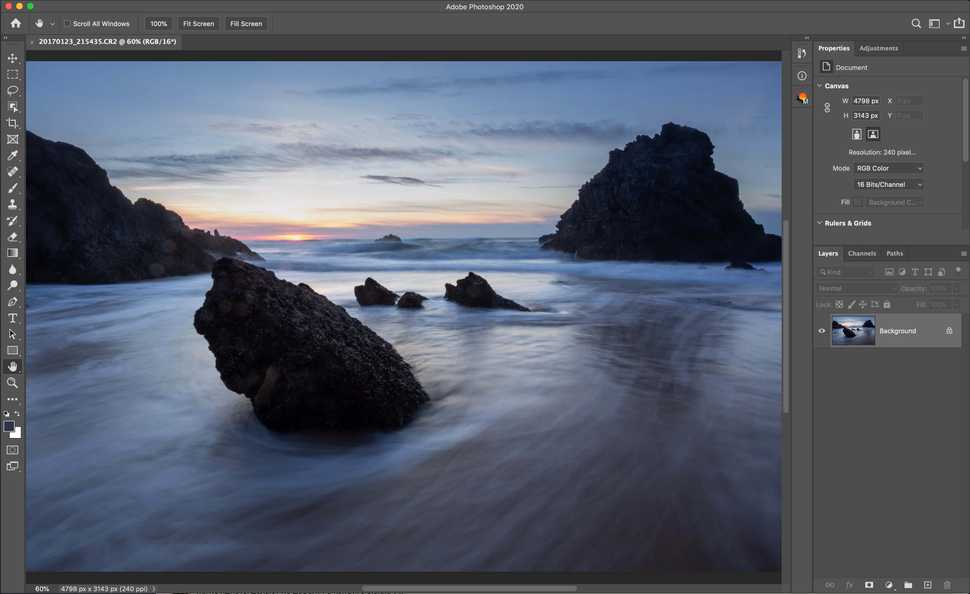
Let's work with the following image as example.
I have already worked with the image a bit in Lightroom and tried to balance shadows and brights. Still, image is very nicely exposed for lights but because of the wide dynamic range shadows ended up quite dark. That is even taking into account that I have increased shadows when working in RAW converter. More over, there are lots of tiny shells on the stone in the front, that are lit by the reflected light from the sky. It would be great if we could somehow make them stand out more.
The problem
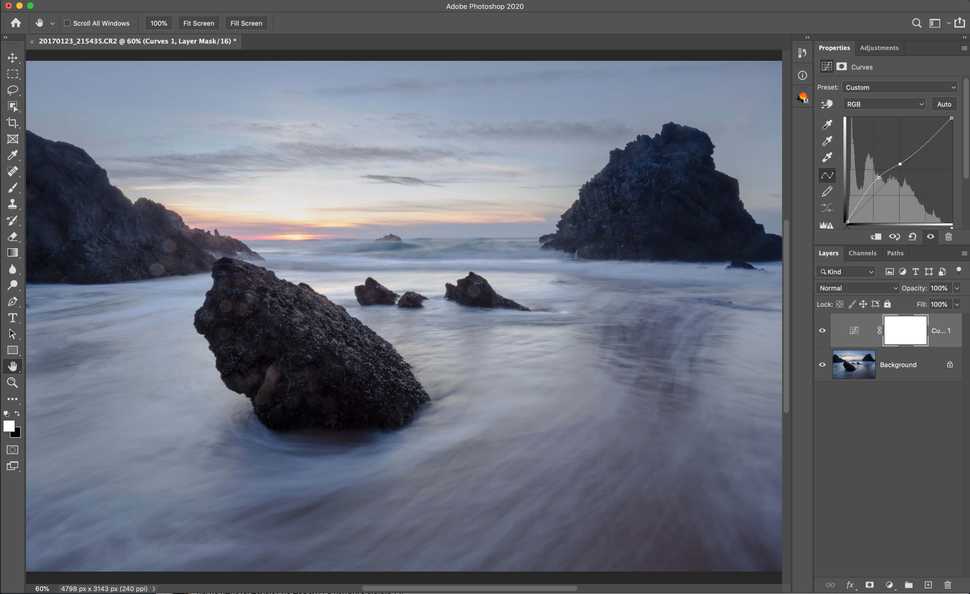
The easiest way to make shadows brighter is to make a curves adjustment layer and increase brightness in shadows. Problem is, no matter how accurate you would be, other parts of the image will also be partially affected. Image ends up gray, all the contract goes away.
You can try to paint this effect in with soft semi-transparent brush, but contrast between water and stones is very high and even with careful attention to details some of the effect would either bleed through the contrasty edge of stones or stones themselves will have some kind of dark border. It is possible to have somewhat good result after spending a lot of time on manual brushing, but result will never be perfect.
Here is where darks masks can really save us.
Controlling shadows with Darks luminosity mask
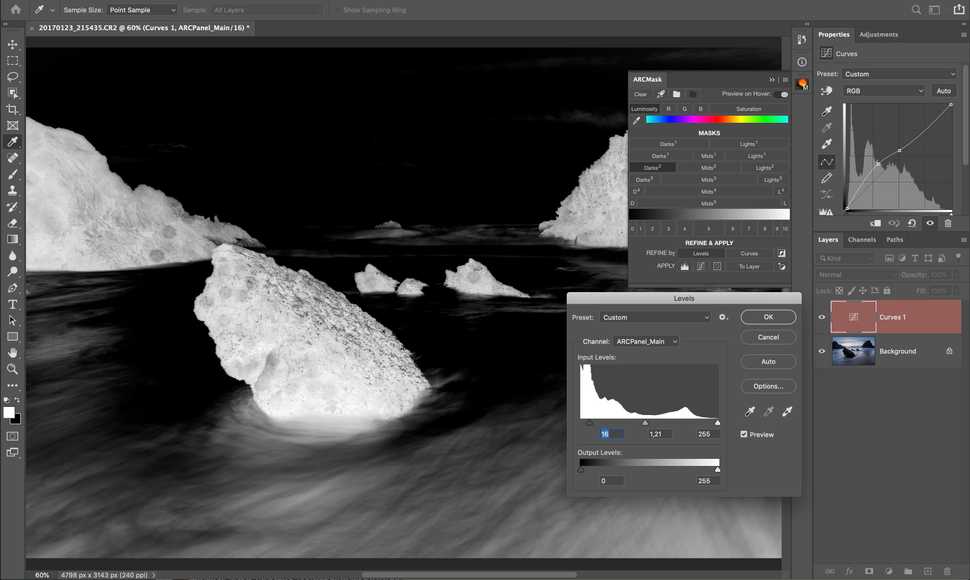
Let's make a mask for shadows using ARCPanel. If you have Preview mode enabled you can just hover over buttons to see the mask preview.
Look through different masks. Masks select parts of the image that are white on the mask. Meaning, our shadow masks will work in the parts where the mask is bright. It can get a bit confusing in the beginning because mask appears inverted.
Try to pick mask so that dark parts of the image would end up selected. I think Darks-3 will work best for this particular image. I have also decided to refine the mask with layers to make it a bit more contrasty.
We have already created a brightening curves layer. If we would select it in the layers and then press
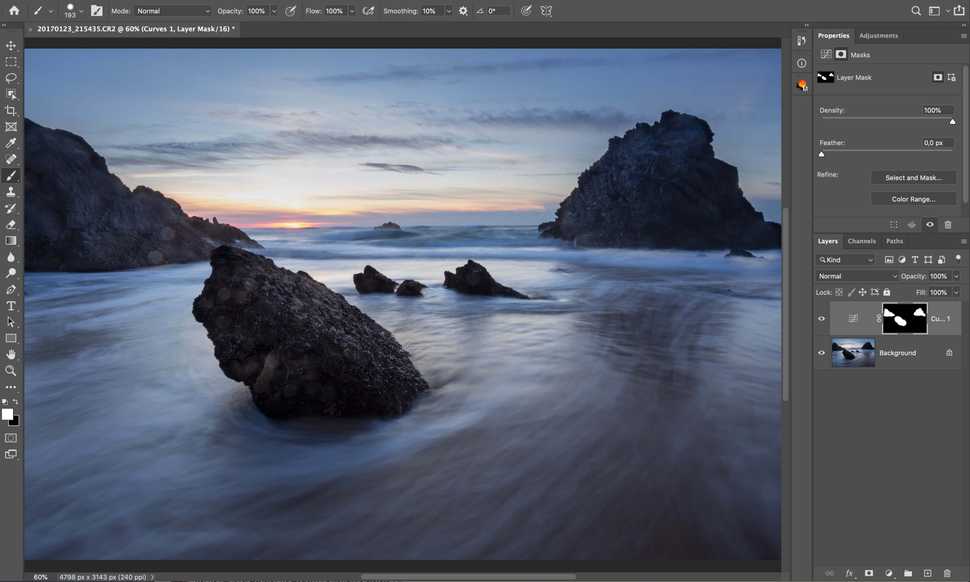
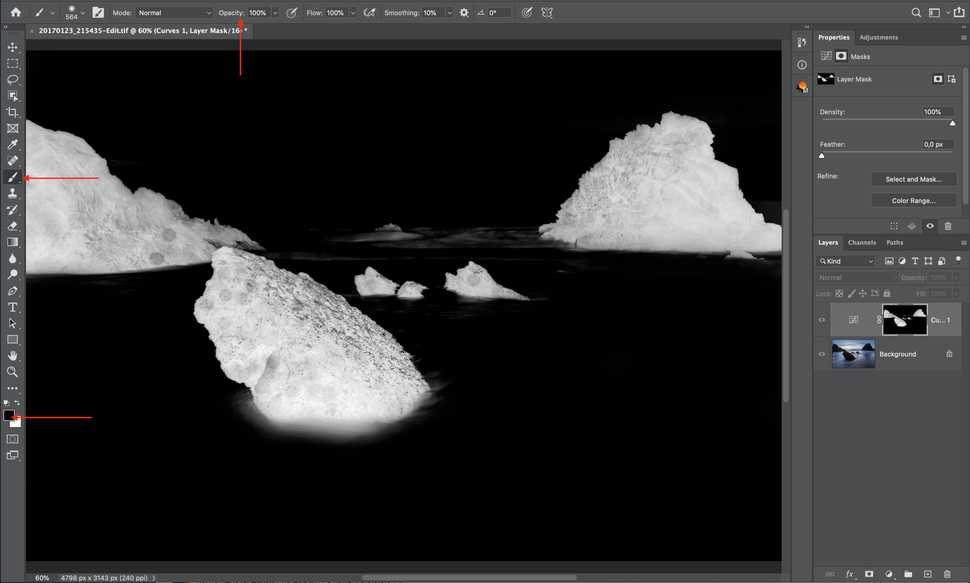
To Layer in ARCPanel, resulting mask will be applied to the curves layer.Now we can adjust the mask even more. If we would click on the mask while holding Alt key, we would see the mask on the screen. White parts are selected. On our darks masks we can see that stones that we wanted to work with are indeed selected, but also some part of the water also ended up selected. To fix that we can pick a brush and paint on the parts of the image we don't want selected with black paint. This step can be also done even after you have already created the desired effect - such non-destructive editing is a big benefit of using masks.
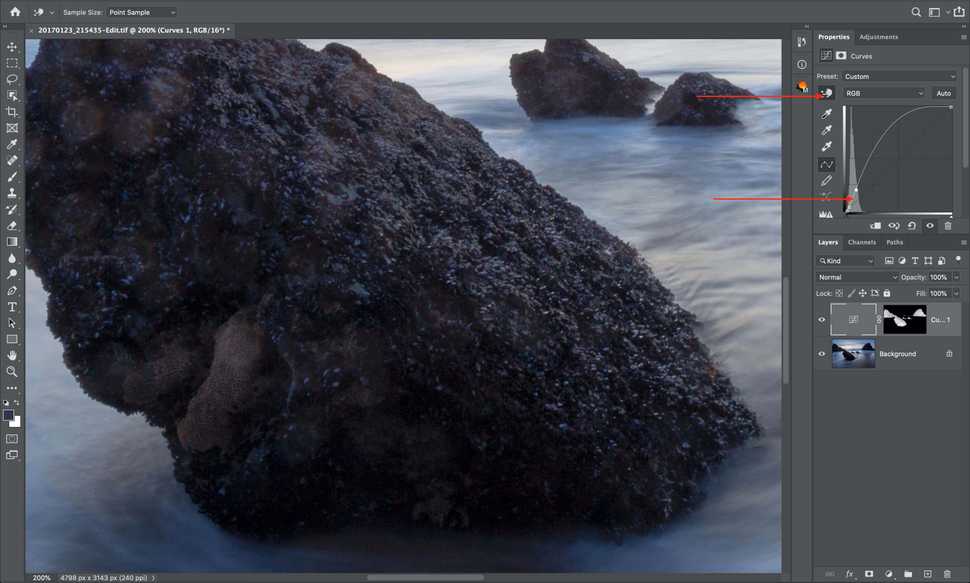
Our curve will only be working in shadows. If would want to increase contrast, we would need to find two spots on the curve - the darkest and the brightest. Then we would need to create an S-curve between those two dots, and everything in between them will get increased contrast.
Changing this curve parameters we can carefully increase brightness of shadows and keep the contrast of the image nicely balanced.
Fixing masks after creation
Now we got our shadows brighter, but taking a close look we can see some gray areas.
Those gray areas are there because those shells, that are lit with the reflected light, are actually quite bright and just didn't get into our darks mask.
Luckily, this is also easily fixable. Let's select our mask, zoom in and paint thorough with a white brush. Now we don't have to be particularly accurate because mask did the most difficult job of keeping the contrast between bright and dark parts of the image for us.
But to completely exclude any kind of error we can use one other feature of Adobe Photoshop - layer blending modes.
Blending modes is a vast and complicated topic that is not directly related to masks, so I will not go deep into details. I can only encourage you to check this topic later because it helps a lot when processing images.
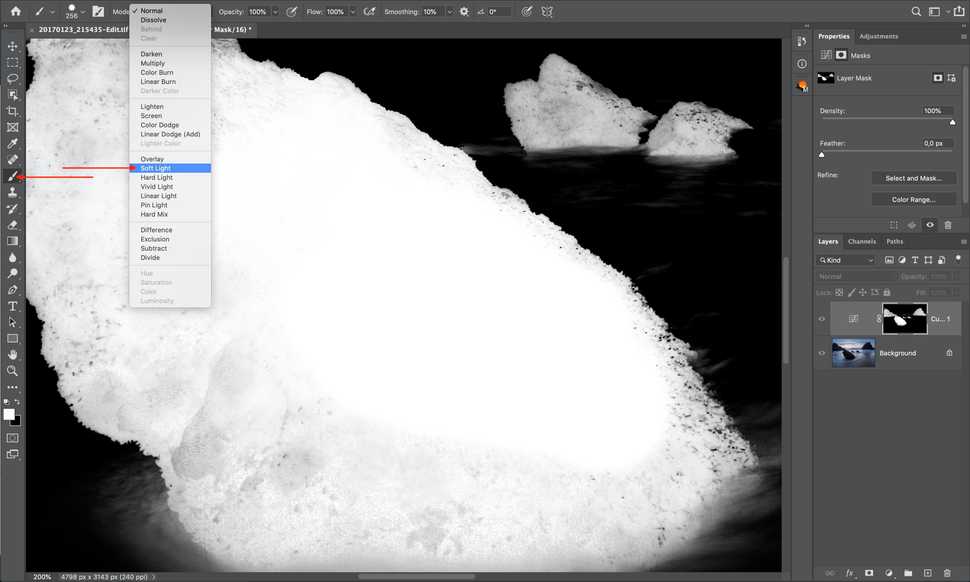
Select white brush and then change it's blending mode to Soft Light. Painting with such a white brush on the image brush will only apply it's effect to the parts of the image that are brighter than 50% gray, completely ignoring darker tones. Meaning it will brighten bright parts of the image. Having a dark contrasty edge you can paint with such brush not being afraid to get into the dark part, letting us brighten the edge of the mask. Parts darker than 50% gray that ended up in the middle (dark shadows on shells) can be painted with the regular white brush with Normal blending mode.
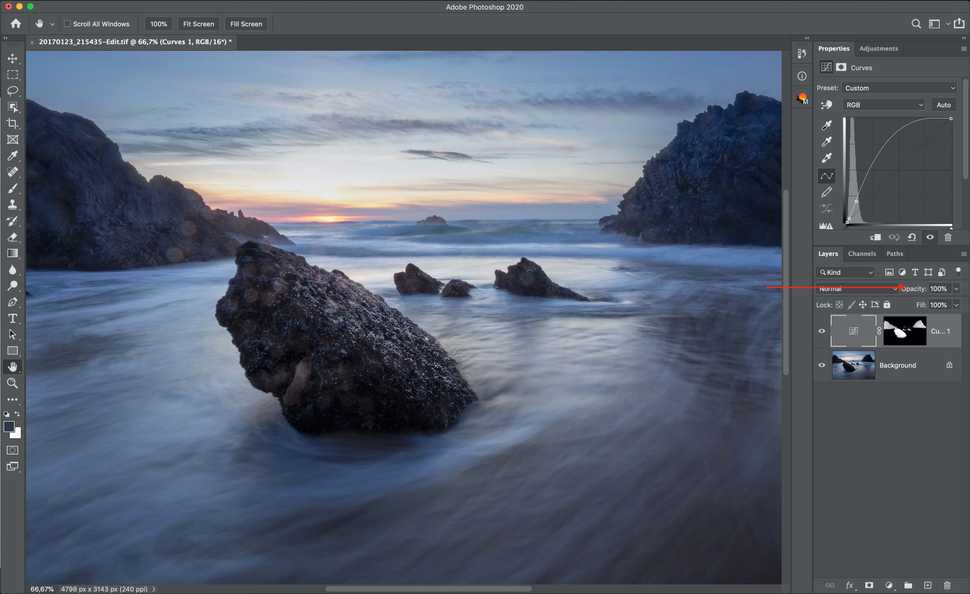
Now going back to the image we would see that shadows indeed are brighter, but not that much. we could increase effect by changing the curves layer, but there is one more way.
We can control the effect layer transparency, carefully picking the desired strength.
Summary
I have deliberately made the example more complicated to show different approaches when working with darks masks, even with such a simple task as brightening shadows. Masks is a very powerful instrument that can give you more than just shadows slider in RAW converter.
In the next lesson I will tell more about midtone masks and after that will show a more general example of how to combine various masks to process an image.
Preparing login widget...
