Share
Luminosity Masks – Lights luminosity masks
In this lesson we will look at how to create, refine and apply lights luminosity masks.
Blending exposures theory
One of the main tasks that lights masks help to solve is blending exposures. Even though quality of images cameras can take has significantly improved over the last few years, high dynamic range scenes still remain a challenge. Because our eye can very quickly adapt to a wide range of brightness levels, scenes with bright colorful sunset and relatively dark foreground still look very natural and nicely balanced to us. But not to the camera.
One of the ways to trick the camera into shooting such a scene is to shoot several exposures. In the most simple case two exposures should be enough. One is taken so that bright parts wouldn't be white and overexposed and another one is taken for the shadow, making them bright enough to still have visible details. Two of these exposures are then blended together.
There are tools that combine such images automatically and technique itself is usually called HDR (High Dynamic Range). Unfortunately, results are quite far from perfect. Even when taking HDR picture with modern phone you can notice that images with very high dynamic range look quite unnatural and have lots of issues when looked at closely. Blending images with masks, on the other hand, quite often yields much more accurate and natural results.
Blending with lights mask
Let' s take 2 images for an example. One is brighter and another one is darker. Images are taken that way because scene is of high contrast - bright sky and dark stones on the ground. We could have used a gradient filter here, but then it would apply not only on the sky, but also on the Lahta-center skyscraper, situated in Saints-Petersburg.
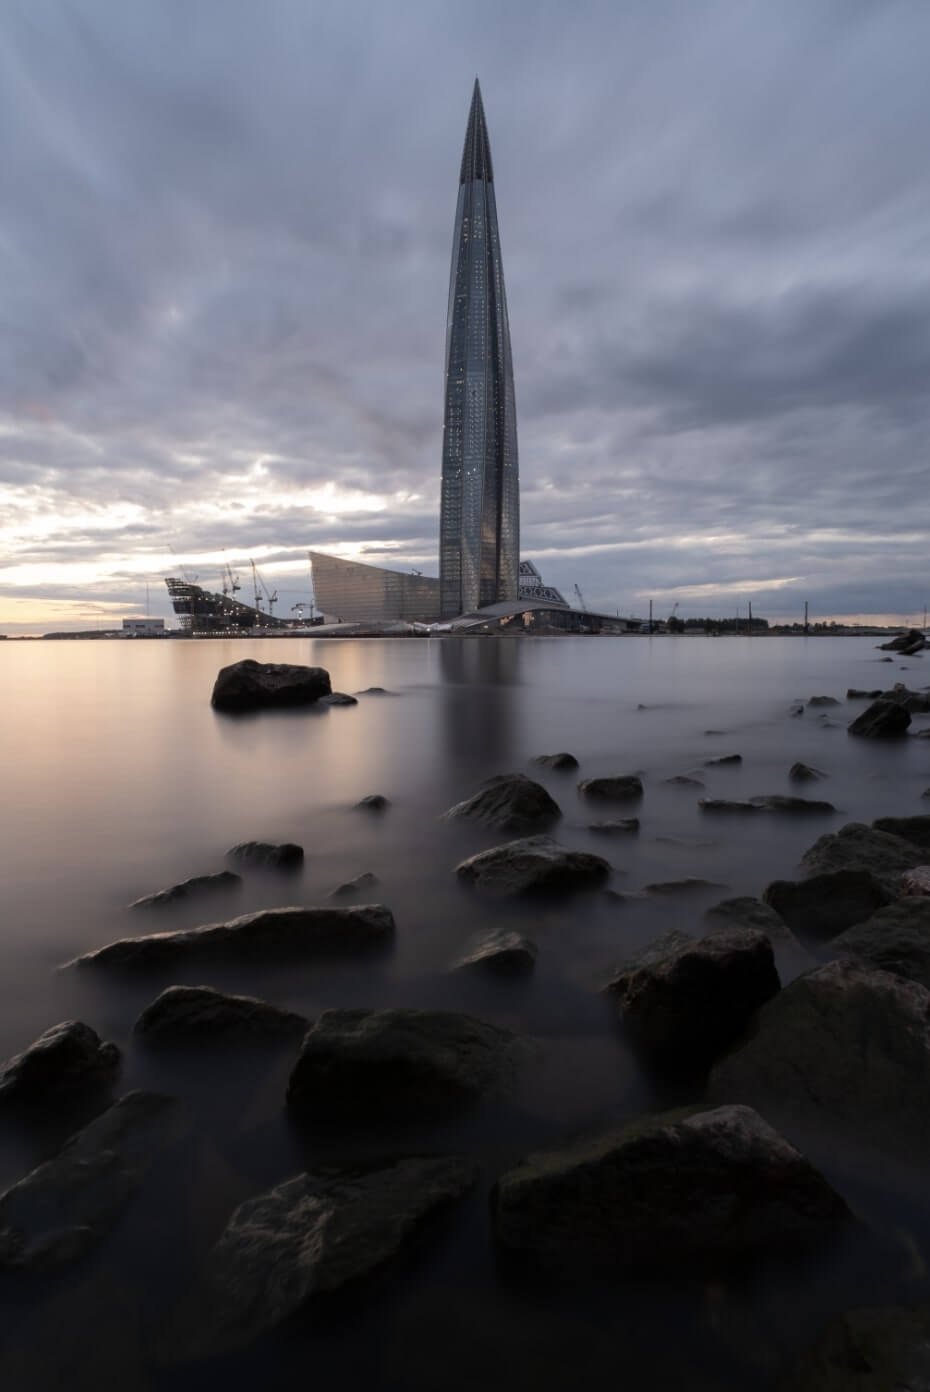
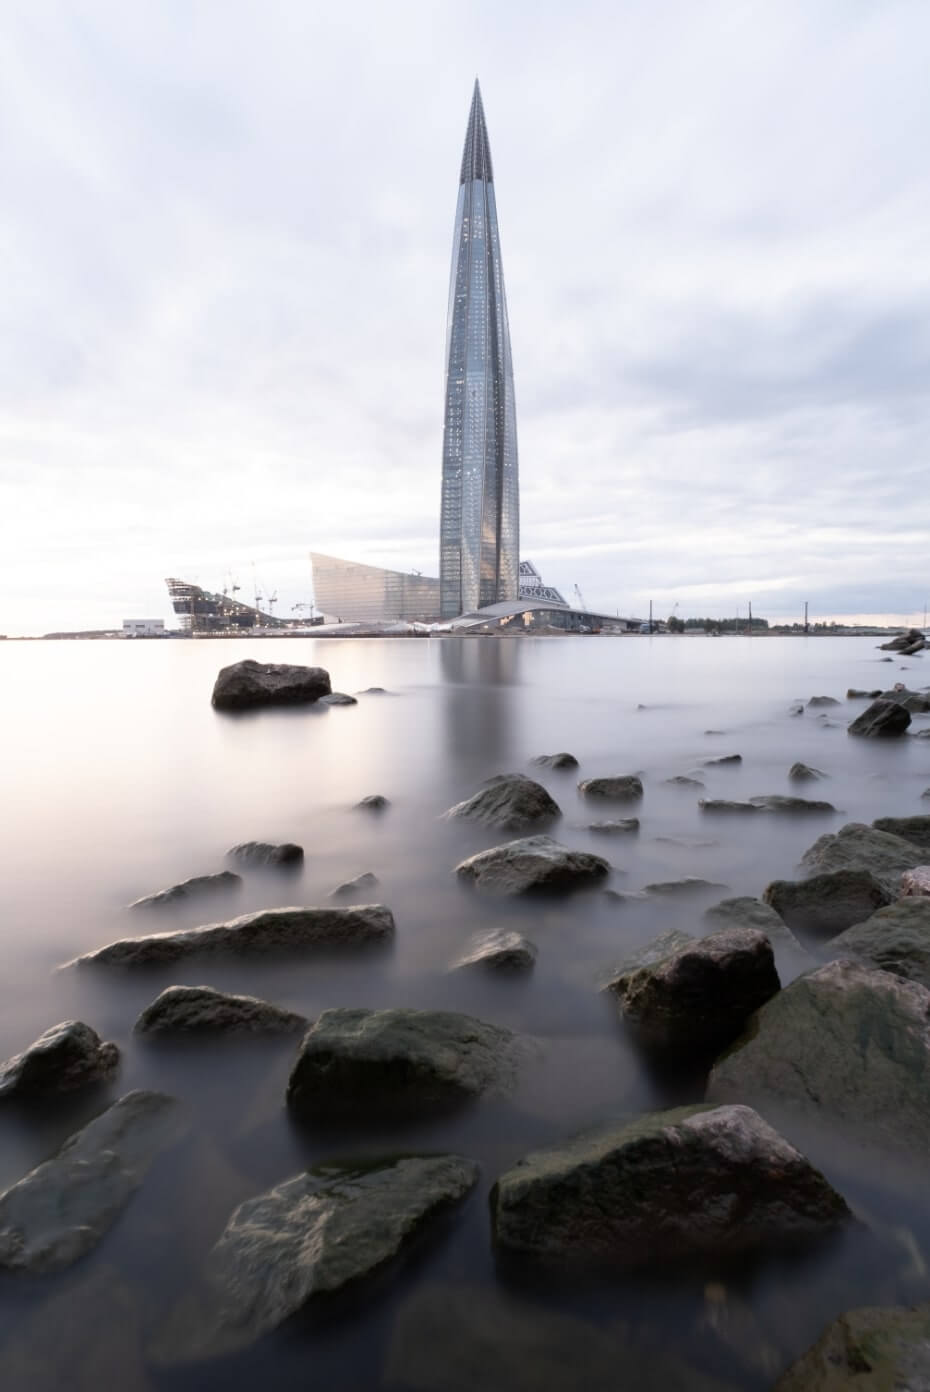
Practical example
Let's think a little and set our goals:
- We would take the bright image as the base - the brighter the image the less noise it has.
- We need to "move" image from the dark exposure onto the bright exposure.
- We should also take into account that darker exposure also brings up some of the sunset color.
We can achieve all that by building lights mask using first image and applying it on the second image.
Here is how our layers look like now

Let's hide the top (darker) layer and build a mask using bright layer as the base.
First we select the source:

We should select the source that will have sky the brightest and with maximum contrast to other parts of the image. Comparing 4 different sources:


It's logical that we will get the most contrast and the brightest sky on the blue channel. Of course, we could also settle with just luminosity, but the better the source the more accurate mask will be in the result.
As the next step we should pick the mask itself choosing from Lights to Lights 5. Looks like Lights 1 and Lights 2 would work the best here.


Lights 1 one has very bright sky. It's bright enough for our purpose and this mask also has lots of details in the shadows. Because mask works where it's bright, for us it would mean that some of the effect will also be applied in the shadows.
Lights 2 has much darker shadows. That means they will be selected less. Sky has some details in the sky - clouds.
So, both masks are not perfect for our cause. That is why we would need to refine one of them. Let's work with Lights 2 and refine it with Levels.

Moving bights point on the left closer to the middle would make lights and bright mids even brighter, not affecting deep shadows.

Now, making sure we have the top (darker) layer selected, we can apply our mask on it using
To Layer button on the panel.
Here is our result!

Image is now equally well exposed in lights and darks.
On to the next lesson.
Preparing login widget...