Share
Luminosity Masks – ARCPanel description
Now that you already saw different kinds of masks and have a general understanding of how to use them, let's go through what ARCPanel can offer in terms of features and performance.
Mask source
SOURCE
Creates a Luminosity mask and uses it as a source for future mask calculations. Will be used until applied, replaced with another source or cleared.
LuminosityCreates a Luminosity mask using luminosity of the Red channel and uses it as a source for future mask calculations. Will be used until applied, replaced with another source or cleared.
RCreates a Luminosity mask using luminosity of the Green channel and uses it as a source for future mask calculations. Will be used until applied, replaced with another source or cleared.
GCreates a Luminosity mask using luminosity of the Blue channel and uses it as a source for future mask calculations. Will be used until applied, replaced with another source or cleared.
BCreates a Saturation mask using most saturated pixels of an image and uses it as a source for future mask calculations. Will be used until applied, replaced with another source or cleared.
SaturationAllows to build a mask using color range sliders. Uses Luminosity by default, but if Saturation is selected will select saturated color ranges. Click to start.
To build a mask, we first need to pick a source. Panel will use it as a base for all calculations. As you know, any image can be split into R (Red), G (Green) and B (Blue) channels. Channels themselves are black and white, but have different contrast depending on the colors. Masks that you would build based on these channels will also look a bit different and target brightness of specific color more.
Here is what a Source can be:
- Luminosity - luminosity of all channels (RGB) of an image
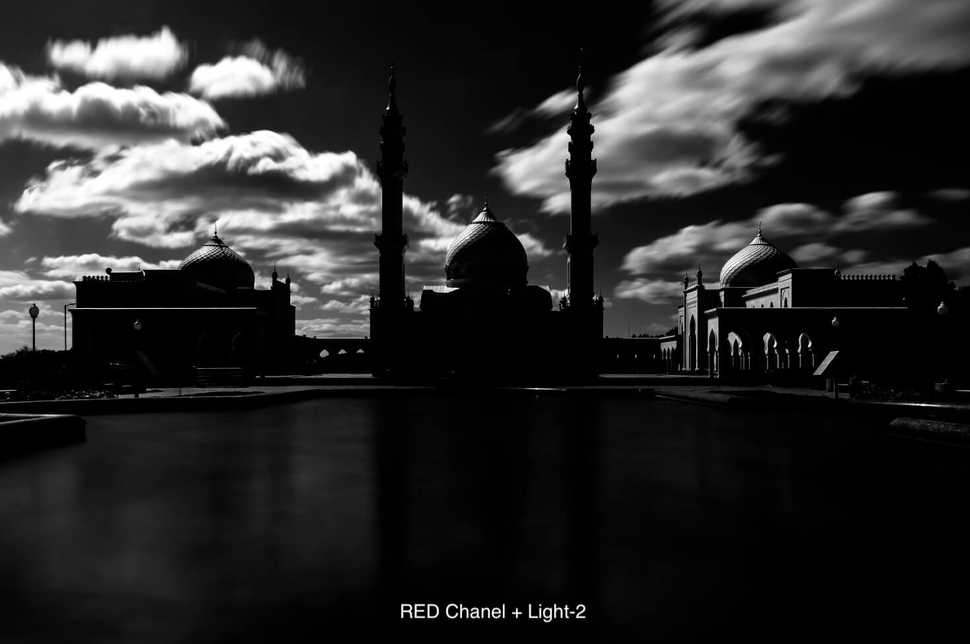
- R - luminosity of the Red channel
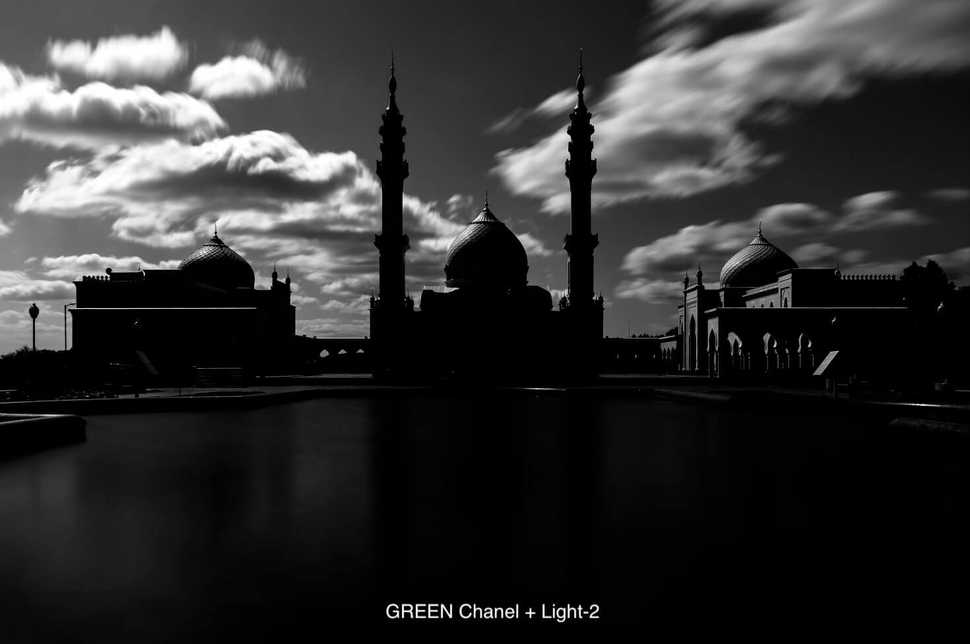
- G - luminosity of the Green channel
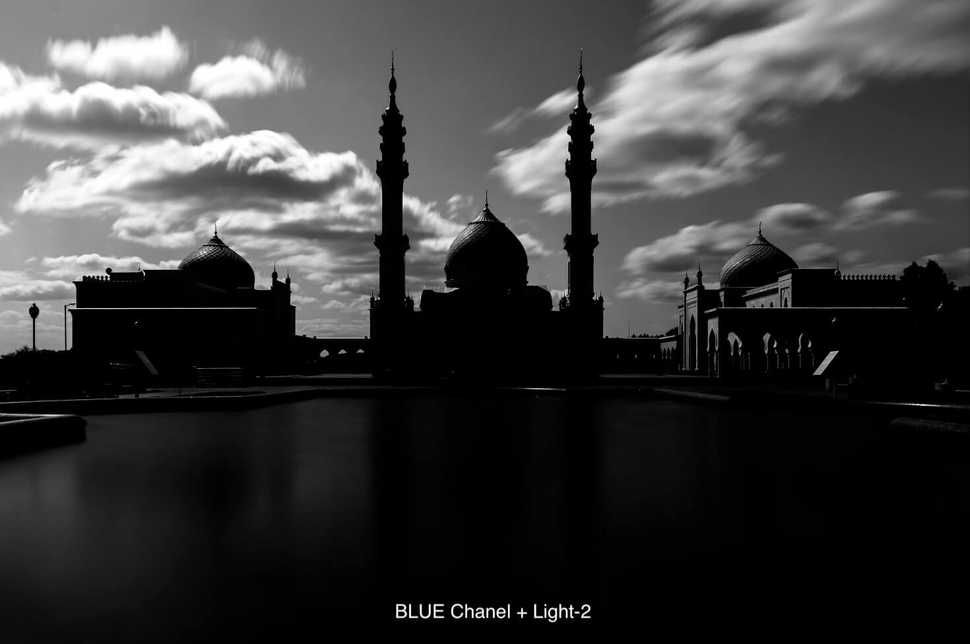
- B - luminosity of the Blue channel
- Saturation - luminosity based on the saturation of the image (the more saturated the color is the brighter the mask)
- Color - Color as a source. Compared to the Select - Color Range option, ARCPanel will build a more accurate color mask. More over, it lets you select a range of colors, putting, for example, all warm colors into same selection
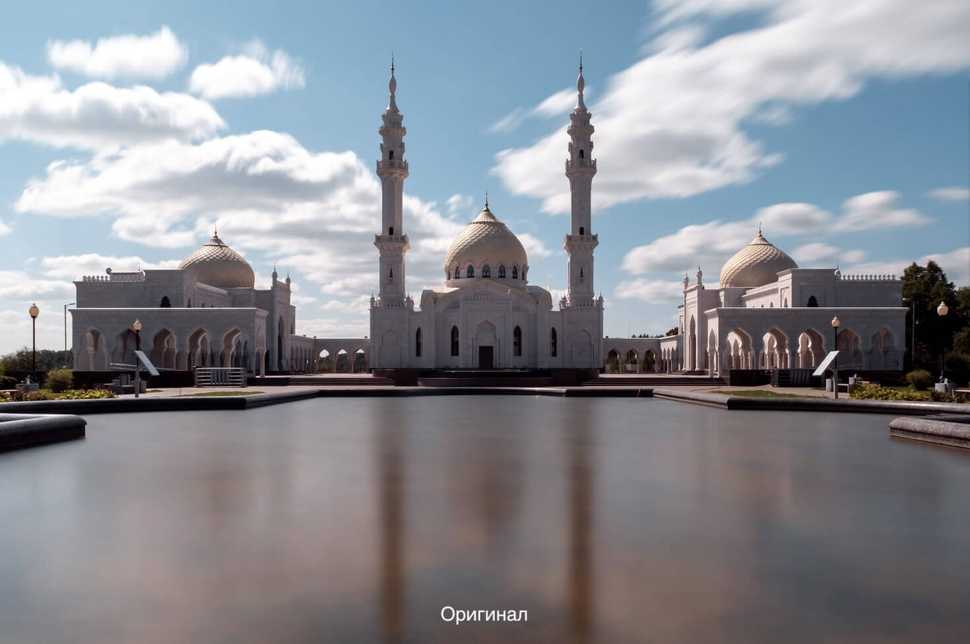
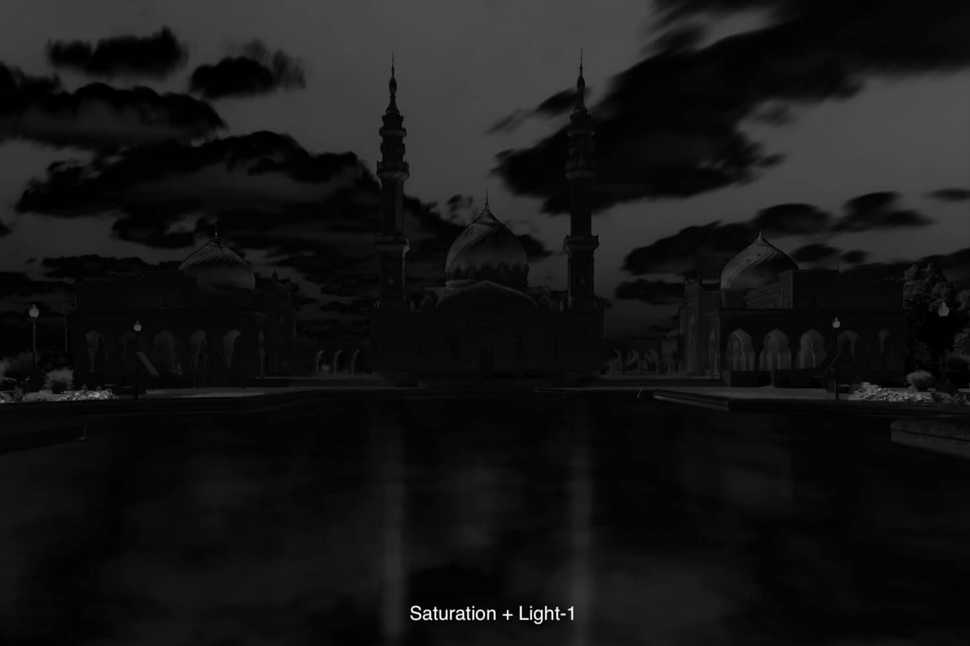
Let's compare these different mask images:
As you can see, different masks are being built depending on the source. And if, for example, our goal would be to select the sky, we could use luminosity mask based on Blue channel, because it has the most contrast between the sky and other parts of the image.
The last source option, Color, is a bit more complex. It works as a sub-source, using Luminosity or Saturation as the main source. It means that color mask will be built either based on how bright the color is or how saturated is it in the image.
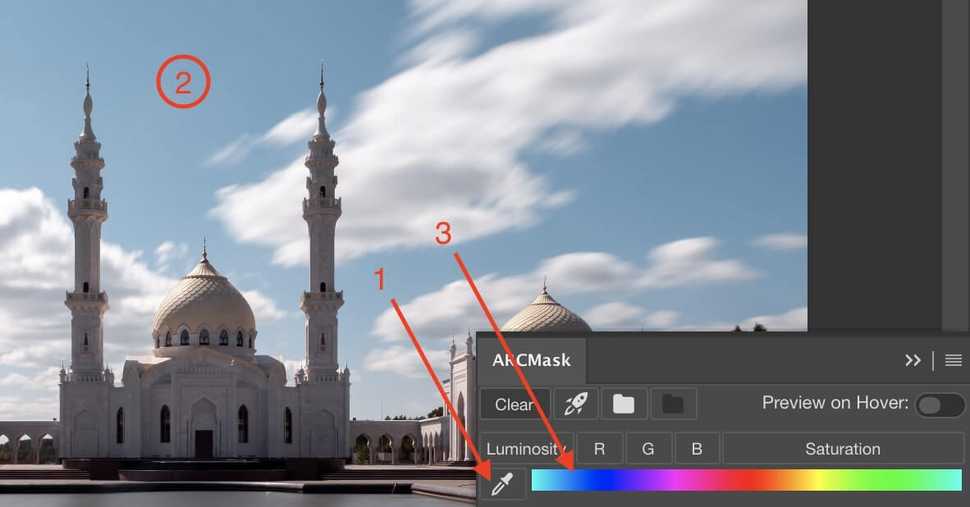
To build a color mask you can use a eye drop tool (1) and just select a color from the image. You can also select and correct range selection using the color slider (3).
If Saturation was not selected as a Source then color mask will by default use Luminosity. It's a common way panel works - uses Luminosity by default.
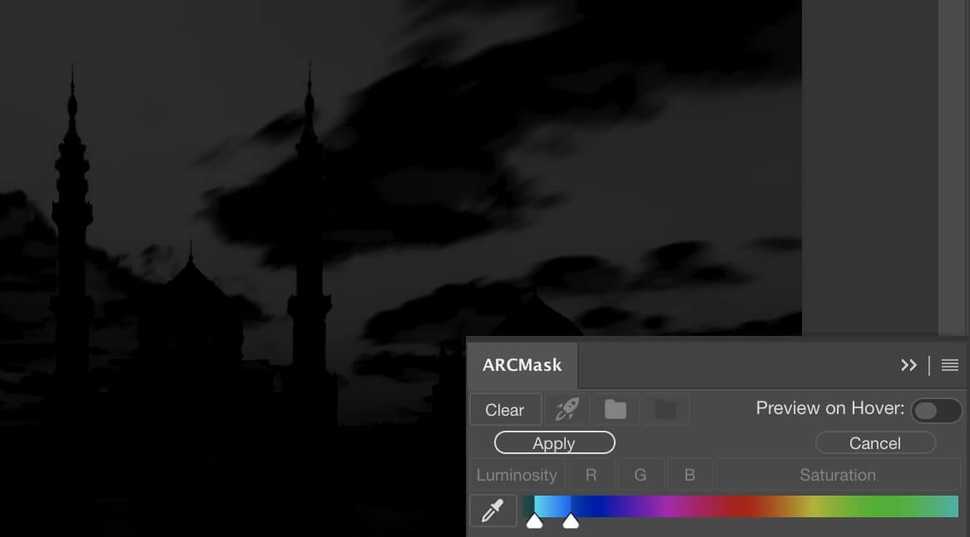
Let's try to select sky on the image (2):
As a result we get a color mask, that becomes a Source after you press Apply button. As it is with any other source, we can apply all the features of the panel to it, like building more limited darks and lights masks.
Because mask was built based on how bright the color was, we would need to first refine it, for example with Layers.
Creating luminosity masks
Panel is split into logical groups: Darks, Midtones and Lights.
Selecting any of the buttons, ARCPanel would build a mask where desired range will be selected the most, and other parts of the image will be less and less selected.
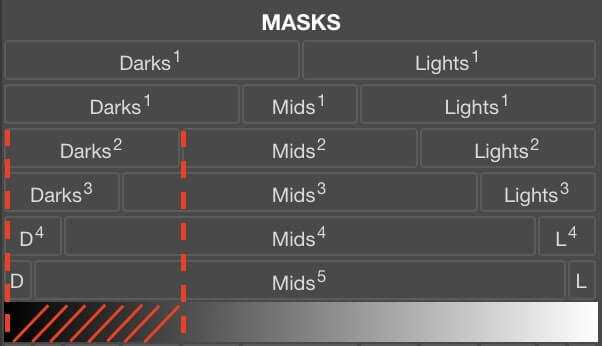
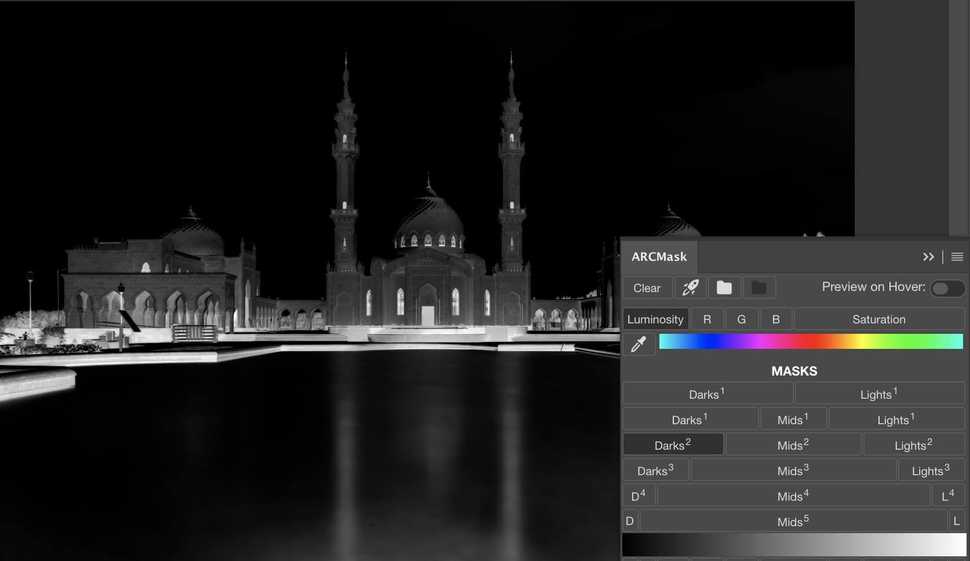
For example, picking Darks-2 we tell the panel to build a mask, where darks would be selected. Gradient bar below the masks helps to see which kind of mask will be built.
Here is the result:
As you know from previous lessons, mask reveals layer effects in bright parts of the mask and hides effect in dark parts of the mask. For the mask that we have just built it would mean that we can target our changes to the shadows by, for example, brightening them or even changing the color.
Adam's Zone System
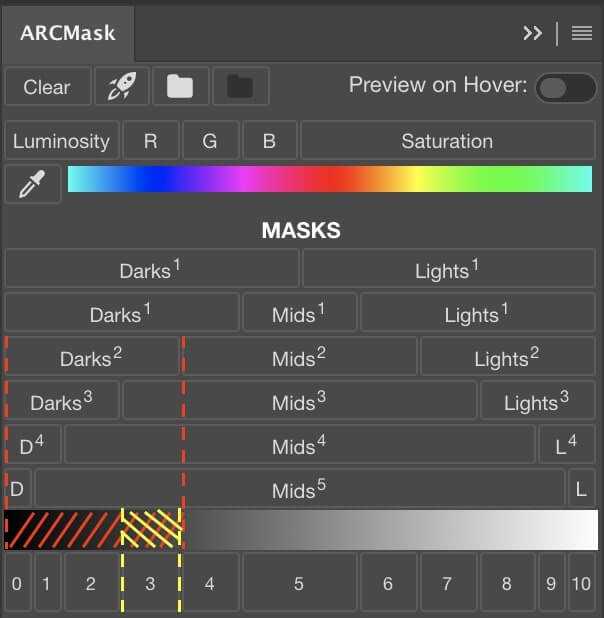
On top of the regular masks ARCPanel also offers Adam's Zones for advanced usage. Adam's Zone "slices" the photograph into different luminosity zones. What is the difference to regular masks?
When building Darks-2, for example, we would select shadows from the mask limit on the right down to the darkest possible tones. But with the 3rd Adam's Zone we would select a range marked yellow on the example image, from the limit on the left to the limit on the right.
Both options can be helpful when processing images and it usually depends on what you want to achieve.
Refining masks
We already got the source and even the mask itself, but often it happens that resulting mask isn't perfect. With practice, you start noticing and sometimes you would want to make the mask darker, brighter or increase contract. To achieve this you can use Levels, Curves or invert the mask directly in ARCPanel. Levels and Curves are the most flexible refining tools and you can usually achieve everything you would want. And if not, you can always just use any tool in Photoshop at any step.
Refine with
Allows to refine the mask using Levels adjustment
LevelsAllows to refine the mask using Curves adjustment
CurvesAllows to refine the mask by inverting it
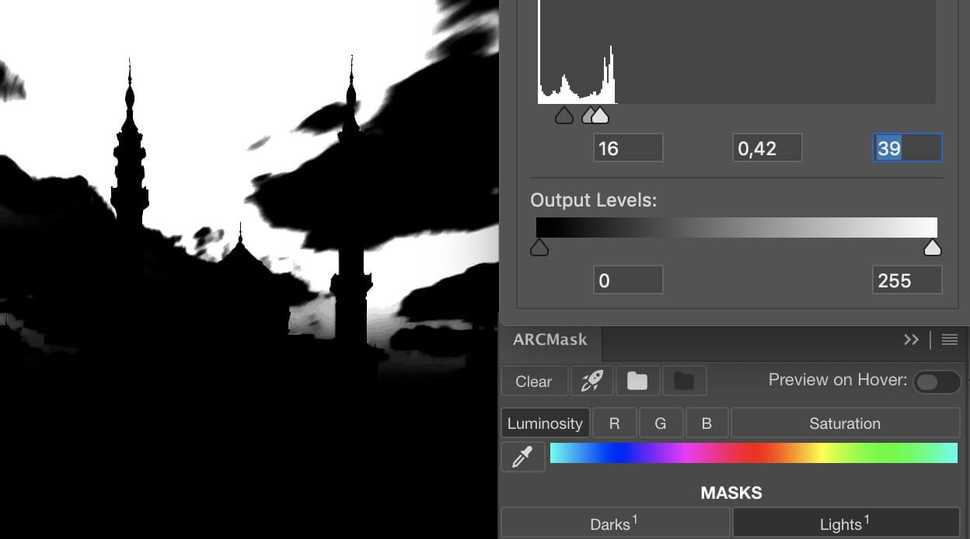
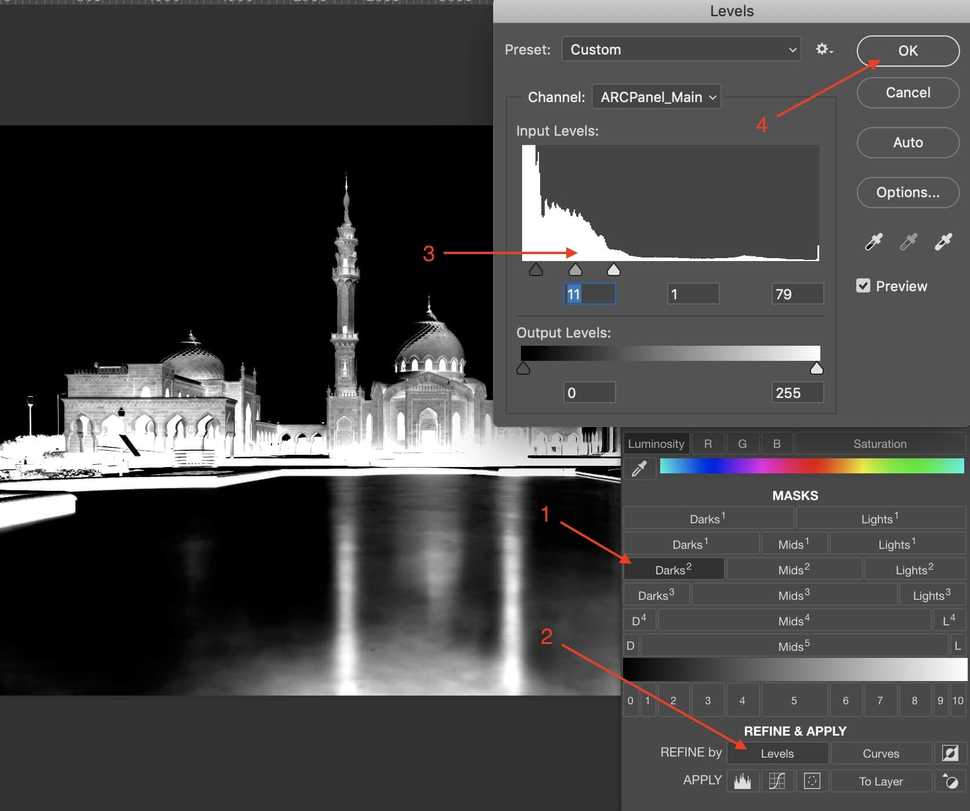
Let's see how can we refine our mask.
For the image below let's include more of the walls into the mask, at the same time not including more of sky and water.
- Select Darks 2
- Refine with Levels
- Change levels so that walls get brighter, but sky and water still stay dark
- Press OK - mask is ready
We can achieve the same effect with Curves too. It mostly depends on what you are more comfortable with.
Applying masks
The last step of detailed mask creation is to apply it to the layer. ARCPanel lets you both start with the layer and set the mask on it and start with no adjustment layer, creating it after the mask is ready.
Apply to
Creates new Levels adjustment layer as sets built mask on it
Creates new Curves adjustment layer as sets built mask on it
Creates a new selection using built mask
Applies built mask to the currently selected layer
To LayerPaint current mask onto layer mask. Sets foreground color to white, selects brush. If layer has no mask, sets black mask, otherise paints on existing mask. Hides marching ants.
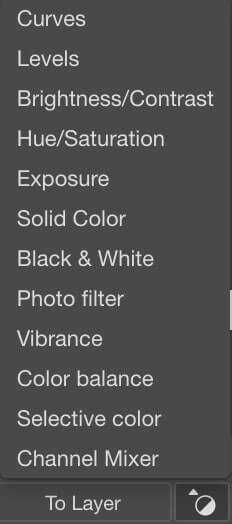
- Creates new Curves adjustment layer as sets built mask on itCurves
- Creates new Levels adjustment layer as sets built mask on itLevels
- Creates new Brightness/Contrast adjustment layer as sets built mask on itBrightness/Contrast
- Creates new Hue/Saturation adjustment layer as sets built mask on itHue/Saturation
- Creates new Exposure adjustment layer as sets built mask on itExposure
- Creates new Solid color adjustment layer as sets built mask on itSolid color
- Creates new Black & White adjustment layer as sets built mask on itBlack & White
- Creates new Photo filter adjustment layer as sets built mask on itPhoto filter
- Creates new Vibrance adjustment layer as sets built mask on itVibrance
- Creates new Color balance adjustment layer as sets built mask on itColor balance
- Creates new Selective color adjustment layer as sets built mask on itSelective color
- Creates new Channel mixer adjustment layer as sets built mask on itChannel mixer
Most popular ways to apply a mask are available in 4 shortcuts:
- Levels - would create a new Levels adjustments layer with mask applied to it
- Curves - would create a new Curves adjustments layer with mask applied to it
- Selection - would load mask as a selection
- To Layer - would apply mask to the currently selected layer
But that's not all! Behind the last button you can find all kinds of supported in Photoshop adjustment layers. Select any of the available options and ARCPanel will create new layer with mask applied on it.
Quick actions
Clear the state and remove temporary panel channels.
ClearEnables Quick Apply mode when preview is disabled and clicking on buttons instantly replaces mask in the currently selected layer
Creates a new group with mask filled white color
Creates a new group with mask filled black color
Generates endless color grading combinations of colors that look good together.
Clear - Resets all masks. Feel free to press it if you feel stuck or don't like resulting mask.
Rocket - Quick blending. Perfect when you need to combine several exposures together quickly.
With Quick Blending enabled, clicking on any mask will instantly apply it to the selected layer, as if you would have pressed
To Layer option in Apply section.Let's say we have 3 different exposures: -1EV, 0EV and +EV. To blend them quickly:
- Press on Rocket icon
- Select -1EV layer and click on Lights 1 mask
- Select +1EV layer and click on Darks 1 mask
With this we would combine together all exposures allowing us to quickly check how different masks would work for the blend.
White/Black Folder - Combines selected layers into a group and sets white or black mask on it.
Preview - toggles preview mode that works when you hover over buttons on the panel.
Summary
As you can see, panel covers all basis for creation and comfortable work with luminosity masks. There are some extra features too with saturation and color ranges masks.
In the next lesson we will focus on Lights masks and see how can they be used on practice.
Preparing login widget...
