In this article
Luminosity Masks – Masks in Adobe Photoshop
Kinds of masks
Layers are at the core of Adobe Photoshop processing suite, but they wouldn't be that popular without a very powerful tool to go together with - masks.
If you're old enough, you probably remember old cartoons and maybe even saw how they were made. Every frame was drawn on a separate piece of paper, and when changed fast, drawings were moving. To add depth and decoration to this concept, backgrounds were drawn separately and characters were kind of on the top, as a separate layer.
This is exactly what layering and masking gives us in Photoshop, allowing to combine together many different layers of images and with mask decide which parts of the layer are visible and which are not.
How does it work?
White mask in Adobe Photoshop means opaque image, black means it's fully transparent.
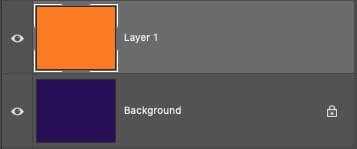
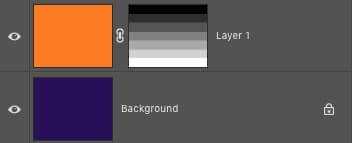
If we would place two colored layers above each other the top one will fully cover the one on the bottom and we would only see orange as the result.
Mask is always displayed to the right of the layer and is always in Black and White.
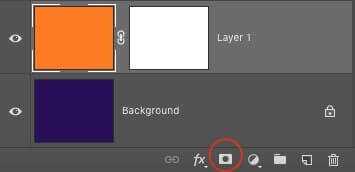
You can create a mask by clicking and icon in the bottom part of the layers tab. Clicking left mouse button creates white mask on the currently selected layer. If you would click with Alt button pressed, mask will be black.
If layer already has a mask applied and you click that icon again, a vector mask will be created. Vector masks are rarely used when processing photographs. To not be confused for now let's agree that at any time only one mask should be displayed on the right of the layer preview. You can delete vector mask by dragging it and dropping into the bin icon on the bottom part of the layers tab.
Now, let's add a white mask to the top layer. Select the top layer and press on the mask icon. Nothing changed visually, that is, because white masks means as if there is no mask at all, layer is fully visible.
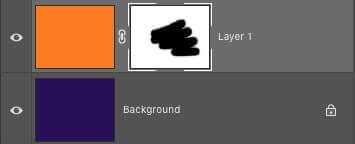
Let's pick a black brush and draw something on the white mask.
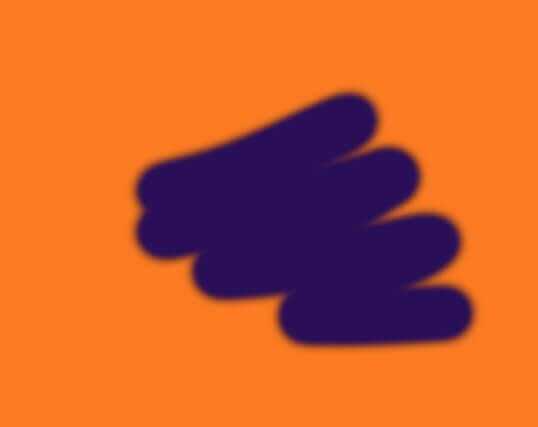
We would see some parts of the bottom layer in places we have drawn with black color.
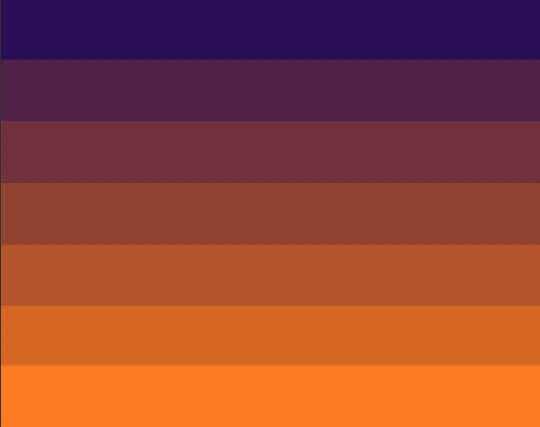
Masks would not be that great if they didn't support half tones too. Masks allow to not only fully make visible or hide parts of the layer, but also do it with a level of transparency. In that case top and bottom layer are mixing together.
If we would make our mask gradient, from black to white (that is, from fully transparent to fully visible layer state), we will see how our colors start mixing depending or how bright or dark the mask is.
Using black and white gradients we can control where exactly our layer would be visible and where hidden.
Masks in photography
Let's see how different kinds of masks can be used when post-processing photographs. Keep in mind that in real work all of the described masks are usually combined into a seamless workflow.
Mask with soft translucent brush
Even though as you know from Intro mask built by hand has it's limitations, it remains one of the most powerful tools in post-processing.
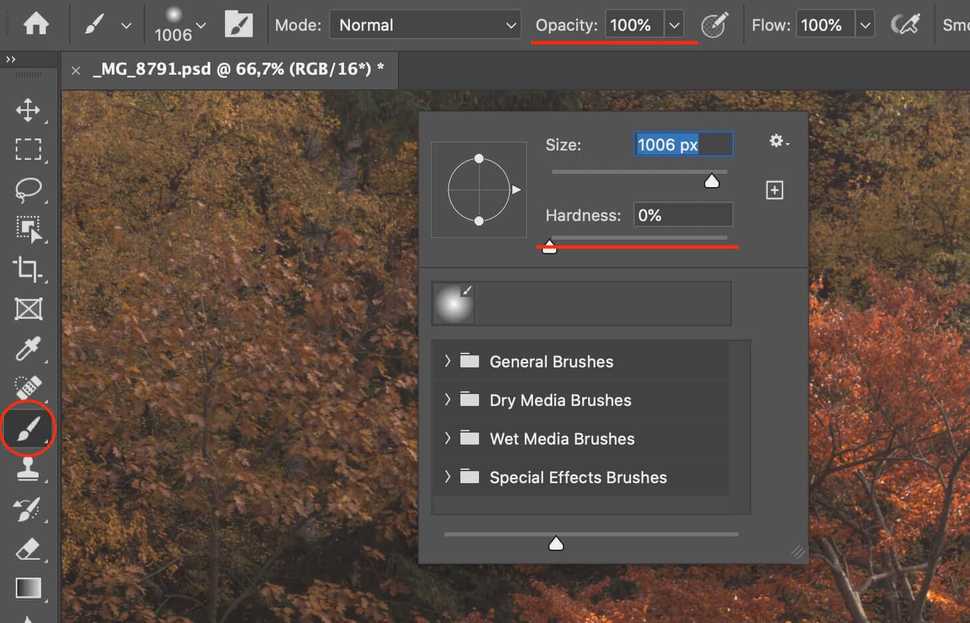
Yes, you can't nicely work around contrast parts of the image like trees in front of the bright sky, but, on the other hand, you can control Hardness and Opacity of the brush.
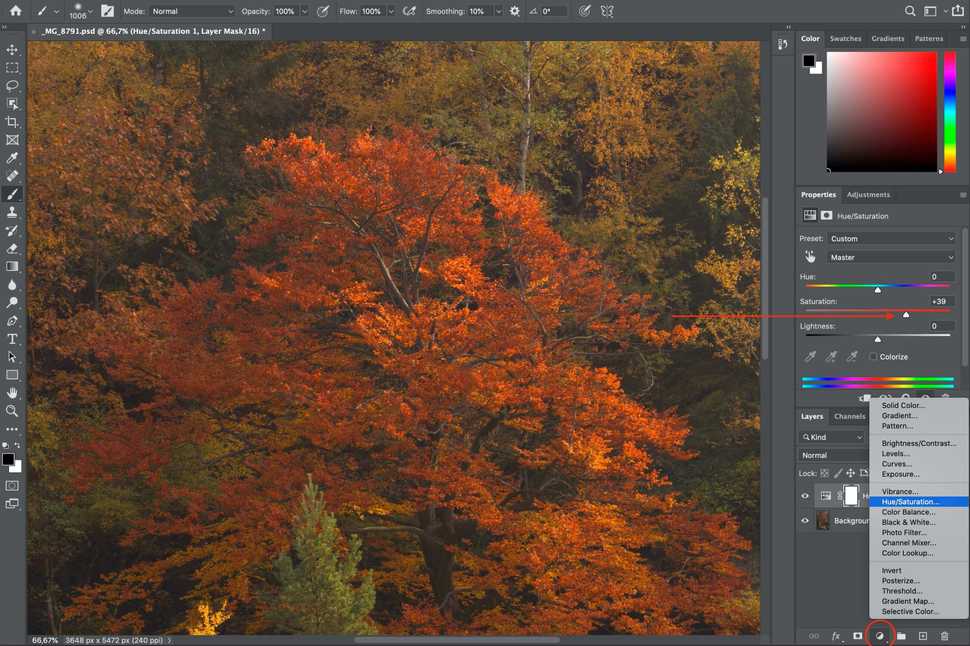
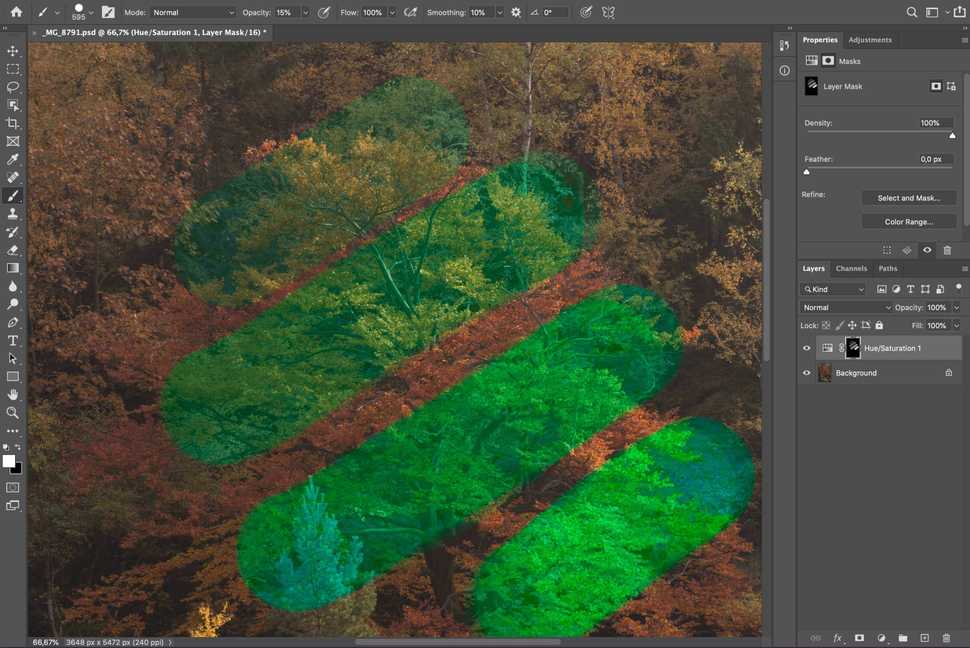
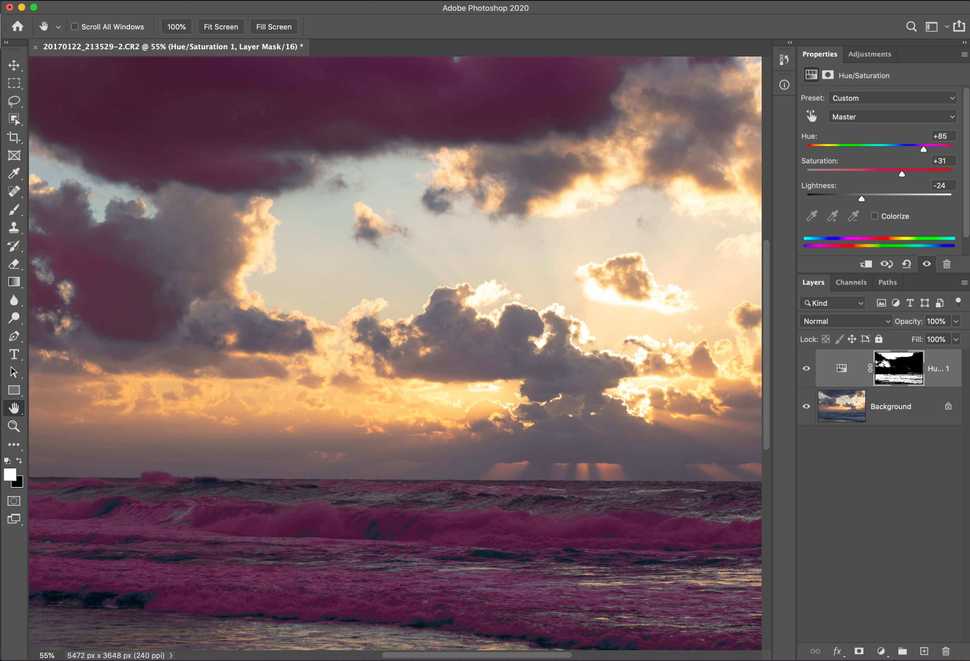
Try to create a new layer with any strong effect. For example, create a new Hue/Saturation layer and increase global saturation.
Now make a black mask for this adjustment layer. You can do it by selecting pre-created white mask on the layer and inverting it with
Image - Adjustments - Invert or pressing Ctrl+I (Cmd+I on MacOS)Select soft white brush and set its opacity to 15%. Now if you would select black mask and start drawing on it with the brush, every stroke will be gradually building up the effect of saturation.
In my example I have not only increased saturation, but also changed tone so it would be easier to see effect strength depending on how transparent was the brush or how many strokes were made.
With such mask carefully selecting hardness and opaque levels of brush you can carefully apply no only simple one-layer effects, but also complex multi-layered effects. I will give an example of that in an upcoming lesson.
Gradient mask
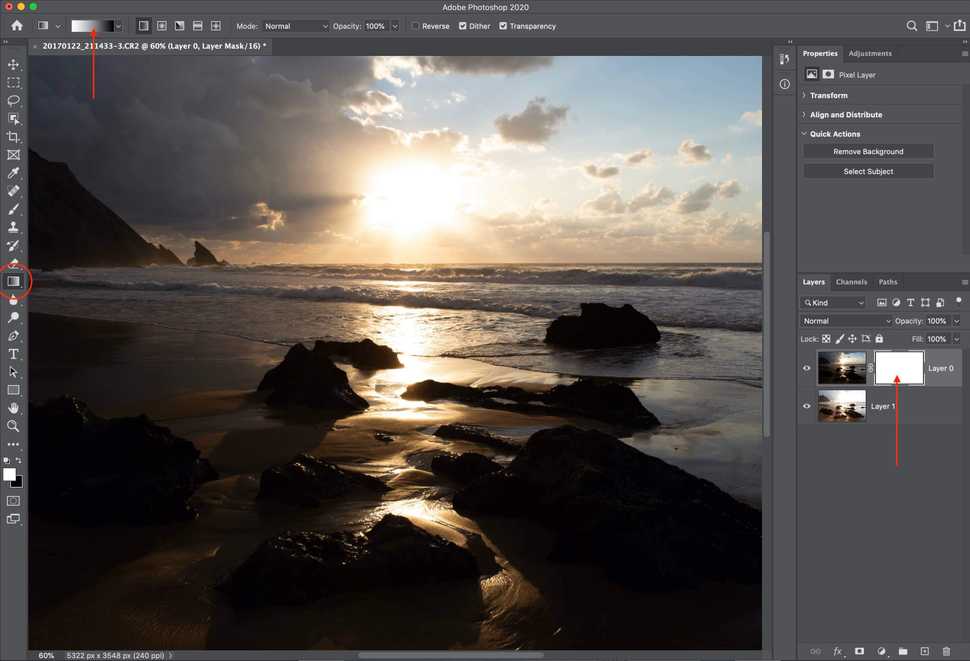
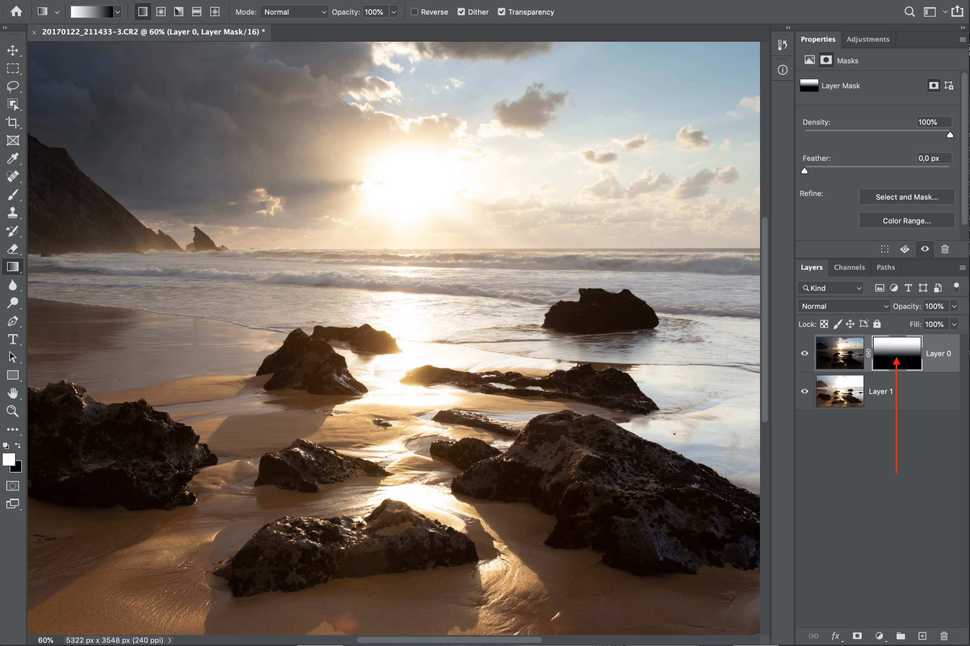
Gradient mask effect almost fully matches the effect of gradient photo filter, allowing to create soft transitions like darkening bright sky in the top of the frame.
Gradient mask is very similar to a soft brush mask, mostly because with gradient you can control where and how hard will be the border between bright and dark parts of the mask. This lets you carefully and gradually show or hide some parts of the image or effect.
More often than not gradient mask is used when there is a visible border on the image, eg. between ground and sky or water. As it is with gradient photo filter, contrast objects standing on that border (like trees) can get in the way - gradient can't work around them and will work on those objects too. You might not want that.
The "Effect" that you build up with a gradient mask can be a darker exposure of the frame or, for example, darkening curves layer.
Color mask
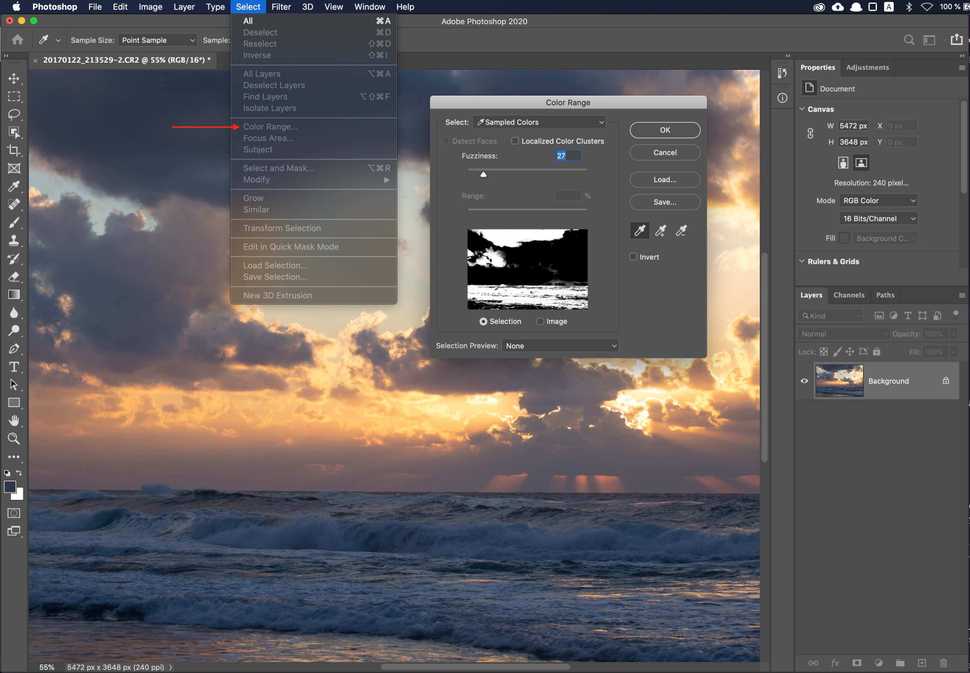
Color masks are created based on a color. Adobe Photoshop lets you do that by choosing
Select - Color Range. In the opened dialog you can select a color and configure selection strength.Resulting selection can be applied to layer as a mask.
As you have probably guessed correctly, such mask lets you manipulate parts of the image by color. For example, you can select all blue hues and change their color with Hue/Saturation layer.
One should be careful working with color masks, quite often there can be some selection artifacts and issues that are visible only when zoomed in.
How to create luminosity masks
Luminosity masks are build based on luminosity of the image, it's brightness. This is one of the most useful and comfortable tools, giving control when processing the image.
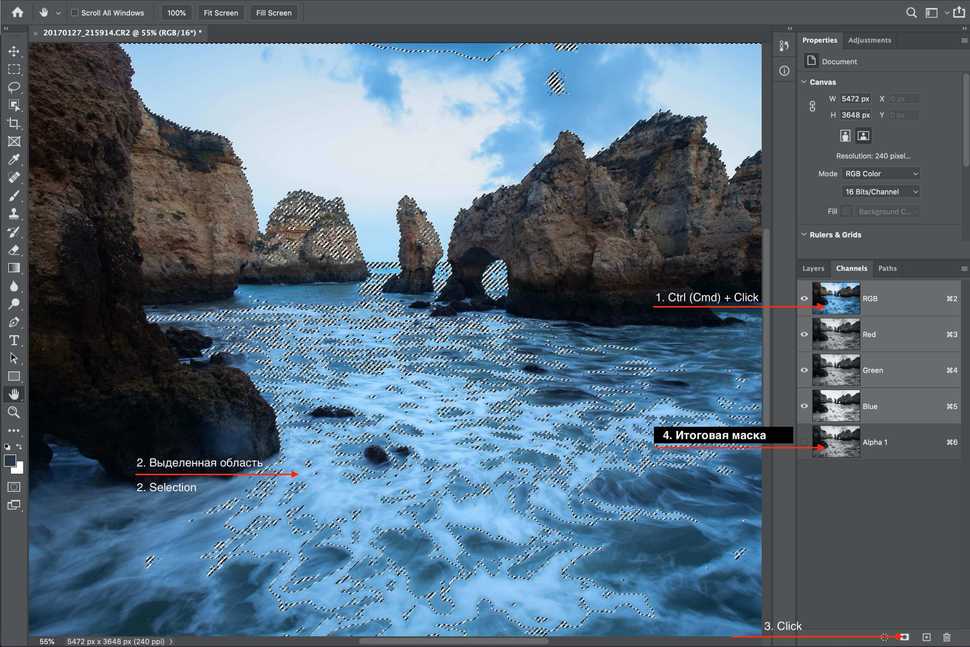
Let's create some masks manually. To create a luminosity masks choose Channels tab. If it's not on visible, select
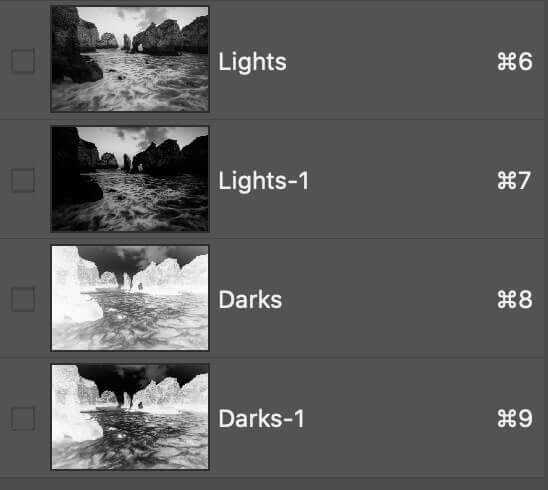
Window - Channels.If you would click on any channel while holding Ctrl (Cmd on MacOS) button, Adobe Photoshop will select parts of the image that are brighter than 50% gray. If you would be working with RGB channel, you will get a luminosity mask. When selection is created and you see it on the screen, press on the mask creation button. This would create a new channel for the mask. Such mask is usually called Lights.
Resulting mask covers all bright parts of the image. If we want to work with not only "bright" parts of the image, but rather with "very bright", we need to limit the mask.
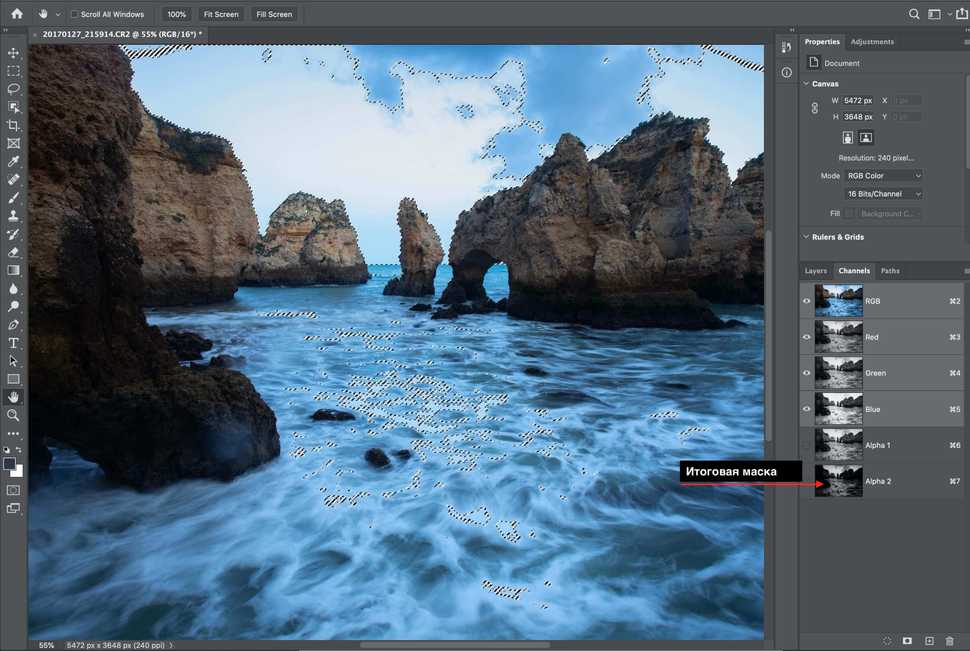
To create a more limited to lights mask let's click again on RGB channel while holding Ctrl (Cmd on MacOS), getting that lights selection on screen. Then we need to hold Ctrl+Alt+Shift (Cmd+Alt+Shift on MacOS) and click on RGB channel again. This will create a new, more limited selection. Clicking on the mask creation button we get Lights-1 mask.
If we want to work with shadows we would need darks mask. There is no button to create such mask in Adobe Photoshop, but if we are to invert Lights mask we would get every other part of the image, which would be Darks.
If we would click on the resulting Darks mask holding Ctrl (Cmd on MacOS) and then once again while holding Ctrl+Alt+Shift (Cmd+Alt+Shift on MacOS), we will get Darks-1 mask.
Continuing like that, we can create more and more limited masks - Darks-2, Darks-3 and so on.
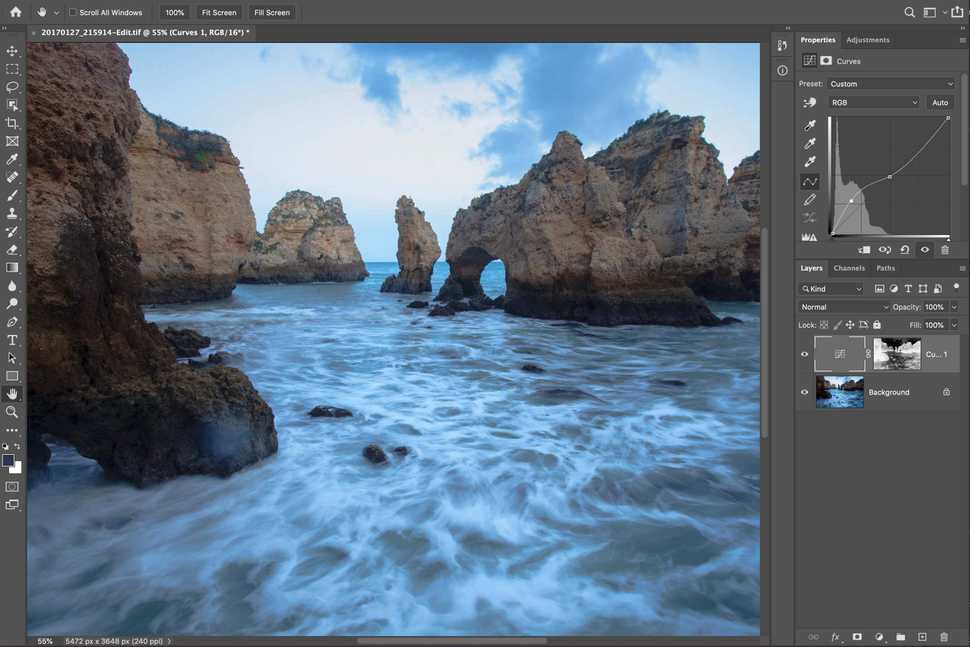
How can we use created masks now? As you already know, clicking on the channel or mask holding Ctrl (Cmd on MasOS) creates selection based on mask. Let's make a new Curves adjustment layer, then switch to Channels, click-select Darks-1, switch back to Layers and set selection as a mask on our Curves layer.
If we would adjust the curve up now, brightness of the image will increase. But because we have limited the effect with Darks-1 mask, the effect will be more in the shadows and much less in other parts of the image.
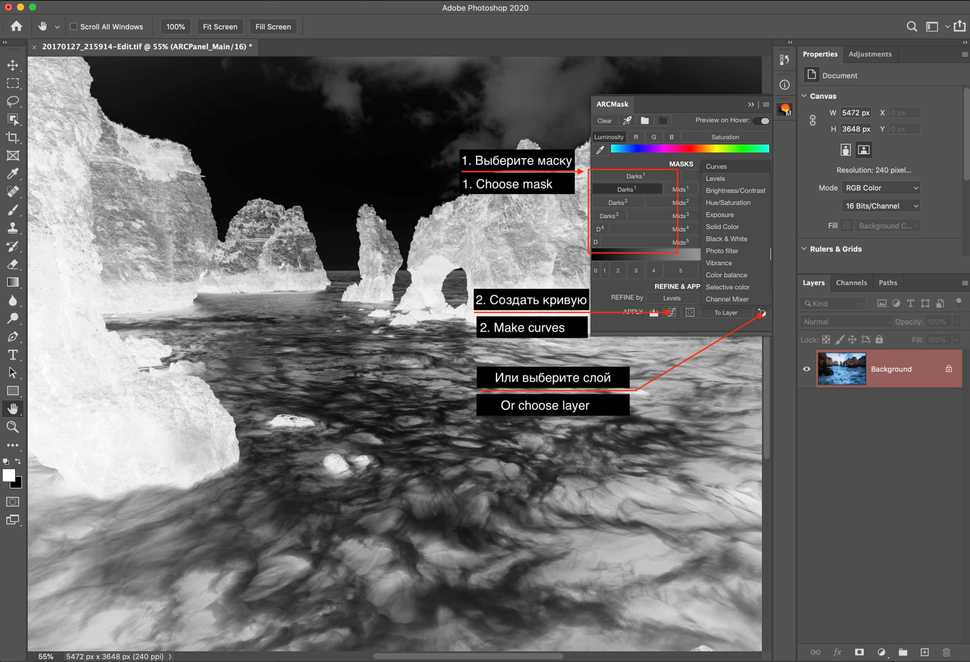
I am sure you would agree it's quite a cumbersome process. More over, every time you change anything on the screen you need to re-build all luminosity masks. Let's see how ARCPanel solves this problem.
- Select desired mask, Darks-1 in our case
- If you have Preview checkbox selected, masks will preview when hovering over buttons
- Click on desired mask
- Click on Curves icon, or choose any other adjustment layer
In next lesson I will go through all the capabilities of the panel and Lessons 4-6 will show how to use masks in practice.
Preparing login widget...
